Permission Analysis
6 minute read
When, in the IT Security tree view, you select a node below the File System, SharePoint, or Exchange nodes for which permissions have been scanned, the main window displays an additional tab named IT Security.
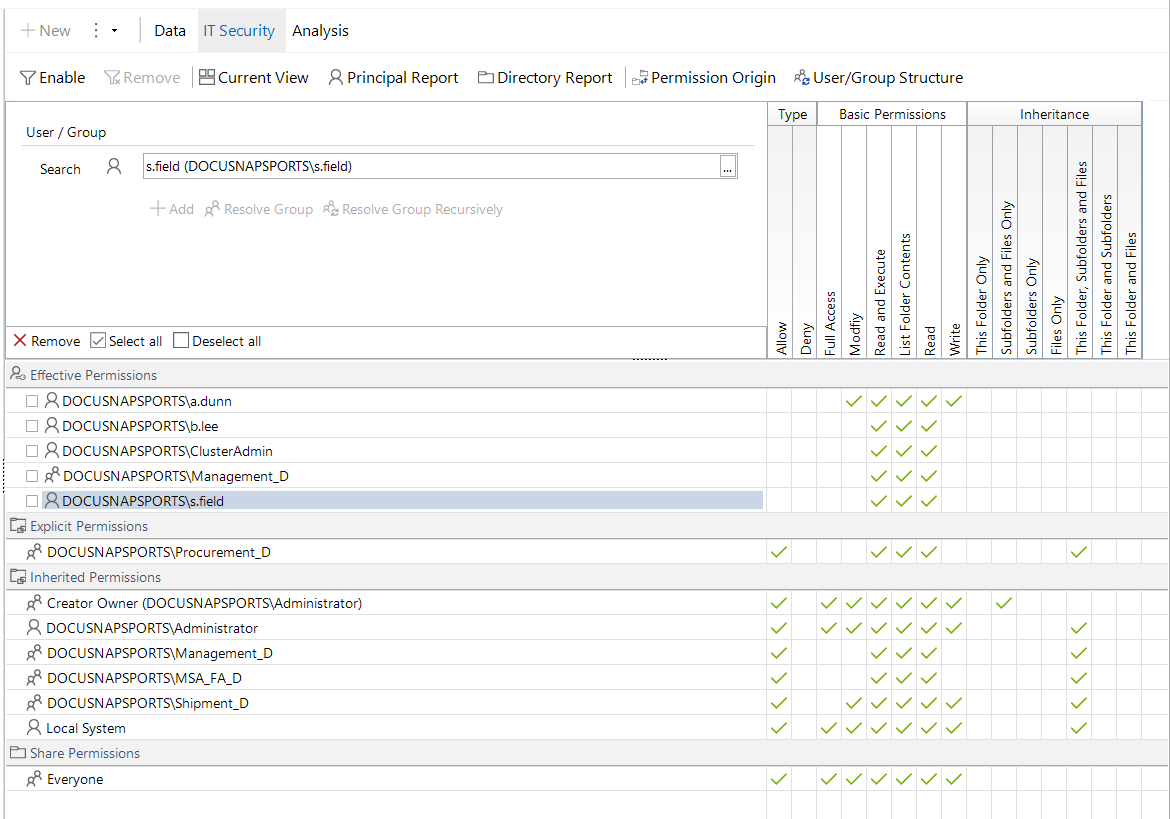
The IT Security tab shows the Explicit Permissions, the Inherited Permissions and the Share Permissions.
Effective Permissions
In order to retrieve the effective permissions for a user or a group, select the desired entry from the User Selection.
There are different possibilities to add users and groups.
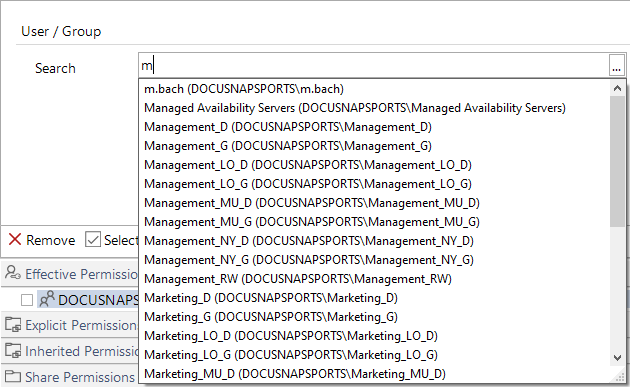
Enter the name of the wanted user or the wanted group. Users are identified by the  icon and groups by the
  icon. Once the first letter is entered, the matching entries are suggested. Users and groups can be added via enter key, selection via the mouse from the suggestion list or via click on the Add button. Users are added to the list immediately. After selecting a group the options are to add all the direct users of this group, to add the direct users and the users of subordinate groups or to add the group. In the options dialog you can alternatively define that when the group is dissolved, members who are a group are also added.

Click the  button in the Search text box to open the Advanced Search dialog.
The names of the users and groups, who should be added, can be entered into the Search text box in the User Selection. All users and groups, who were selected in the Advanced Search dialog, are displayed in the Selected User/Groups field. Click the
 button if you want to remove the according entry.
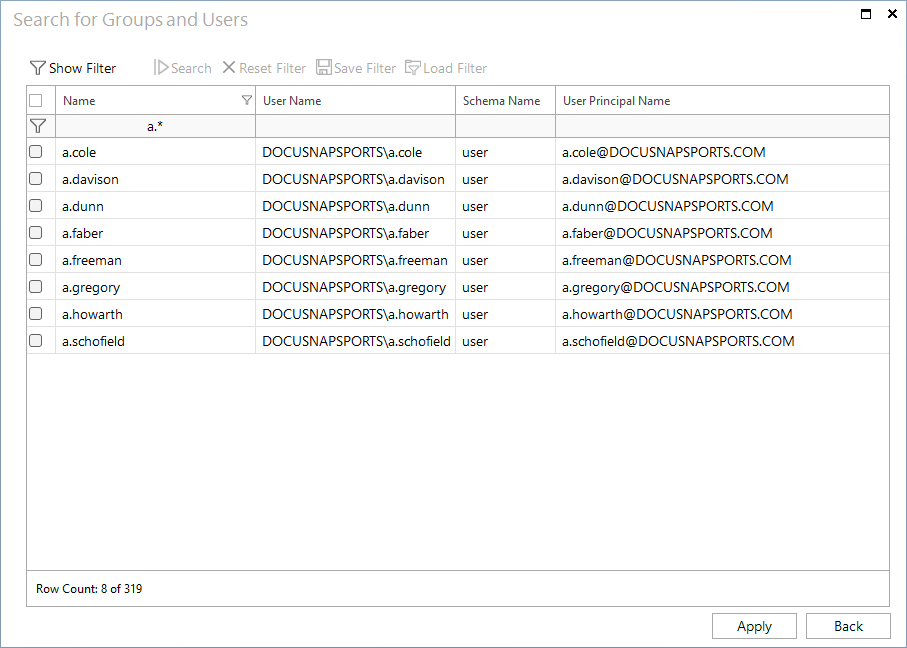
Click the Advanced button to refine the search for active directory users and groups further. Enter the name of the wanted entries in the Filter text boxes at the top of the grid. It is possible to just enter a part of the name in this text box (a.*) and all users and groups who contain this string are listed and can be selected. Select the wanted entries with the according checkbox and click the Apply button to add the users and groups.

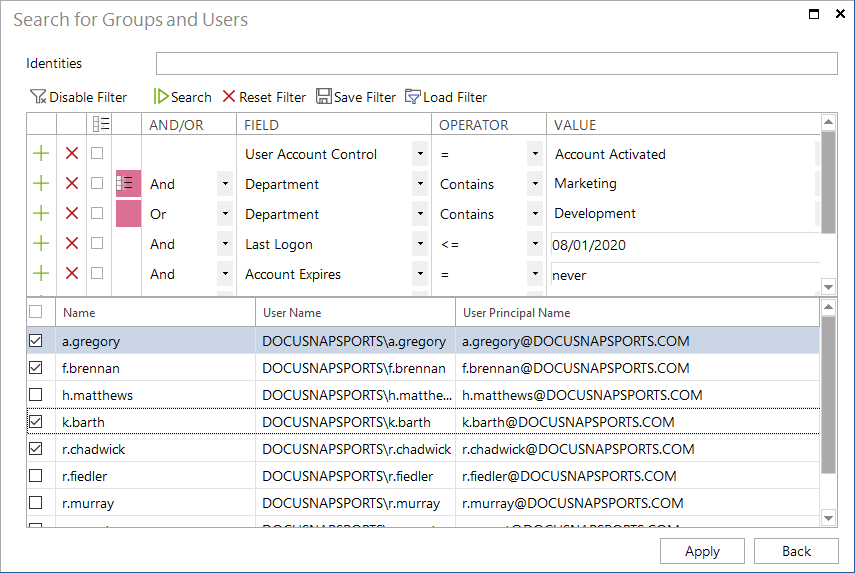
Click the Show Filter button to open the filter. The filter provides the ability to select users and groups through the definition of one or more conditions.
Click the button  to add another row. Click the button
  to delete the current row.
Field
The column Field lists all ADS properties for users and groups. Depending on the selected property different operators and suggestions are offered. For User Account Control the different options like Account activated are provided. If the property is a string the first twenty entries are displayed. Subsequently the suggestion list can be filtered by tipping the first letters of the wanted entry. For properties which are a period of time a date has to be given in MM/DD/YYYY or MM.DD.YYYY format. To find users and groups who for example don’t have an expiry date, enter as value the word “never” instead of a date.
Operator
The column Operator provides several operators.
- Contains: The specified value must be contained in the properties of the user or the group.
- Not Contains: The specified value must not be contained in the properties of the user or the group.
- Starts with: The value of the user or group must begin with the specified value.
- Ends with: The value of the user or group must end with the specified value.
- =: The value of the user or group has to match the specified value exactly.
- <>: The value of the user or group must not match to the specified value.
- <=,>=,<,>: The value of the user or group has to be less than or equal (<=), greater than or equal (> =), less than (<) or greater than (>) the specified value.
And/Or
Once several conditions are specified, select in the And/Or column whether the conditions should be linked with And or Or. If the terms are linked with And, then all conditions have to apply to the user or the group. If the conditions are linked with Or, only one of the terms has to match the user or the group.
Grouping
Use grouping to nest the conditions as needed. For example two terms can be linked with Or and then be extended with And to include another condition. Click the checkbox to select the conditions, afterward click the  button to group the selected entries to one condition. Only conditions listed one below the other can be grouped. The button
  marks the start of the group. Click the
  button to revoke the grouping. It is possible to organize the grouping in several levels. Select more than one group and click on the
  button to group them into one condition.
Click the Search button to list the users and groups who match the specified filter.
If a term is entered in the Identities text box, then the users and groups are filtered by this search term and the specified conditions.
Click the Save Filter to save the specified conditions in an XML file. When the Advanced Search is opened the next time, click the Load Filter button to recover the conditions from the XML file so they don’t have to be defined again.
Select the wanted entries with the according checkbox and click the Apply button to add the users and groups.

Afterwards all added users and groups are listed in the Selected User/Groups field. Click the Apply button to add the users and groups below the Effective Permissions heading and display their associated permissions to the selected directory.
When a different node is selected, the users and groups will not be deleted. The effective permissions will be recalculated for the selected node and the selected users or groups. The users and groups are only deleted if you select a node from a different company since the selected users and groups are not part of this company. Click the Permission Origin button to display the analysis of the permissions for the selected user or group. To display the group memberships of the selected user or group click the User/Group Structure button.
To delete an entry check the checkbox of a user or a group and click the Remove button.

Filters
The Data Explorer displays all directories of a scanned system. To display the filter below the permissions list, click the Enable button in the action bar. Once you have defined the desired filter criteria (Write, Read, etc.), only those directories will be displayed in the Data Explorer that match the filter set for the selected user or group.