Linux Systems
4 minute read
To start the wizard for inventorying Linux systems, click the Linux button on the Inventory ribbon. The Linux Systems step will be displayed after you have selected a company and a domain (see: Basic Steps).

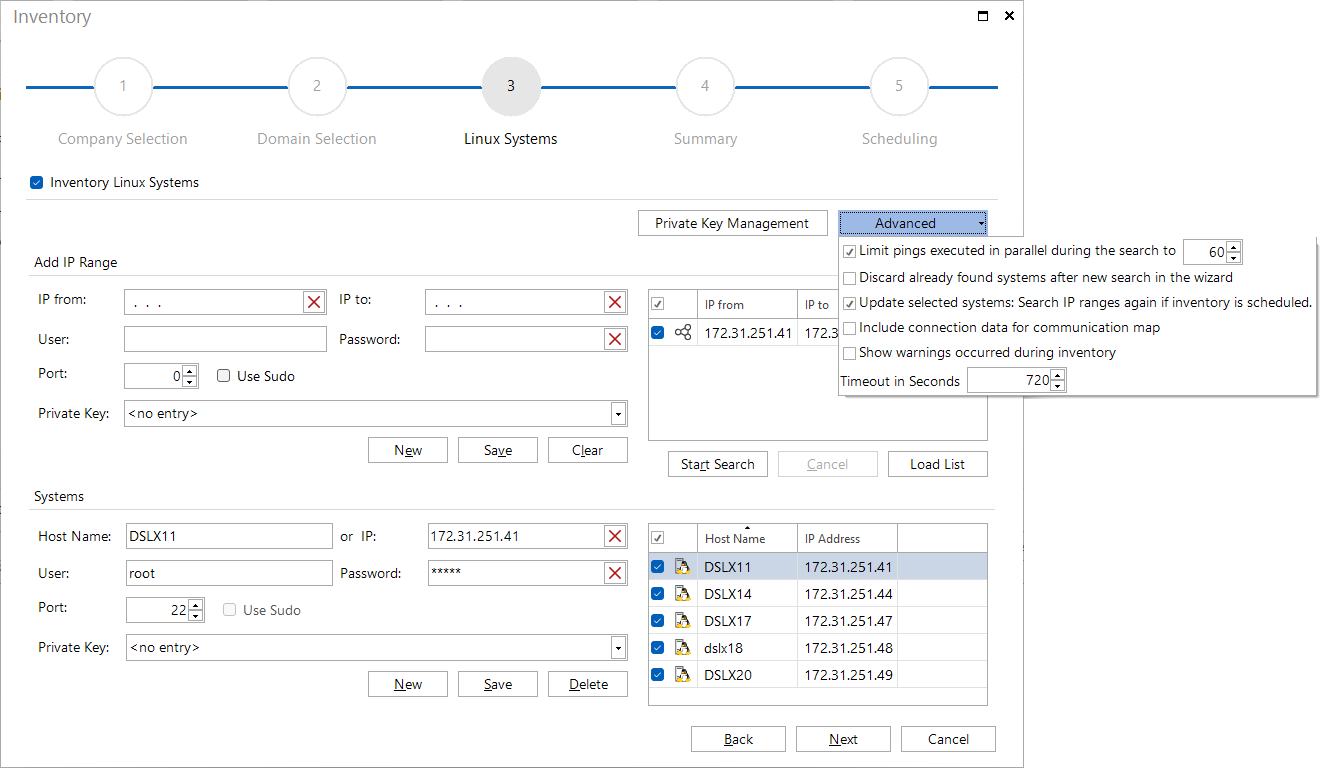
If the firewall is alerted due to too many pings during the search of the IP segments, the number of parallel pings can be limited during the search.
If a new search is started in a different IP range, the Discard already found systems after new search option can be used to define whether already existing systems should be deleted.
When Linux inventory is scheduled and executed at a later time, the Update selected systems option can be used to determine whether only the selected systems are inventoried or the IP area is scanned again, and all found systems are taken into account for the inventory.
If the connection data is not required, it is possible to exclude it during the inventory by using the option Include connection data for communication map and thereby speeding up the inventory process.
Linux inventories are declared successful when at least some of the expected data could be inventoried. Usually, only the root user is fully authorized to access the system. If other users are used, this can lead to an incomplete inventory result. If the option Show warnings occurred during inventory (Preview) has been activated, the respective devices will be reported as Scan incomplete at the end of the inventory. More detailed information is provided in the debug log for analysis. The debug mode must be activated in the options dialog so that the warnings are entered in the debug log during the inventory.
In the options dialog, the timeout is defined. For special cases in the Linux environment, the timeout can be increased up to 2500 seconds in the advanced options of the Linux wizard.
A Sudo user can also be used for the inventory. For this you have to activate the Use Sudo checkbox.
Private Key
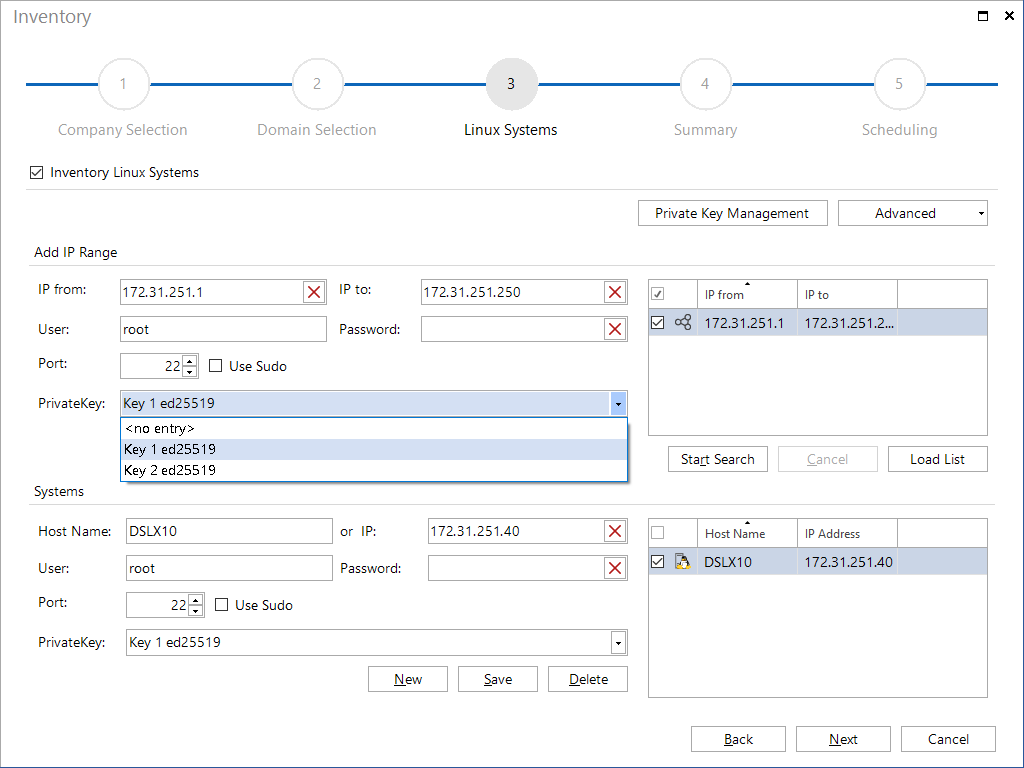
By importing private keys created on Linux systems or SSH keys created by Docusnap, the password can be omitted for the Linux inventory. Keys can be selected for entire IP ranges as well as for individual systems. The preselection from the IP ranges can be overwritten for individual systems. If no key is used, a password must be entered. However, both authentication options can be used simultaneously - key and password. Both variants are checked, the first one, which has success with the login, is used.
Clicking the Private Key Management button opens the dialog for creating and managing private keys. The private keys can also be managed in Docusnap Management.
More information about the use of Sudo and Private Keys can be found in the article Alternative authentication Linux in the Knowledge Base on the Docusnap website.

There are two ways to identify the available Linux systems:
Entering an IP Segment Manually
First, you need to enter the required information (IP from, IP to, User, Password, Port) in the Add IP Range group and save this information. Then, click the Start Search button to identify the Linux systems in the specified segment(s). During this process, the individual IP addresses in the specified segments will be pinged. Each Linux system that replies successfully will be added to the Found Systems list.
If multiple IP ranges should be included in the inventory, they can also be imported from a CSV file by clicking the Load List button, instead of creating them individually using the buttons New and Save. In the CSV file the values for IP from, IP to, User, Password, Port, Use Sudo and Private Key must be listed in that order separated by “;”. If no port is specified the port 22 is used by default. For the column Use Sudo you can use true or false and 0 or 1. For the Private Key the descriptive name defined in Docusnap is used. If no private key is specified or a name for which no corresponding entry can be found, the field remains empty.
If a line doesn’t match this format, this one will be omitted.
Entering Individual Computers Manually
In addition to scanning entire IP ranges for systems, you can also specify a single system. In the Found Systems group, click the New button and then enter either a system name or an IP address as well as the User name and the Password for the system(s) to be scanned subsequently.
The actual inventory process is based on the systems listed in the Found Systems group. All systems selected there will be scanned.