Network Map
4 minute read
The network or routing map can be created using the Create Docu wizard, the Network wizard or by clicking on the Network Map or Routing Map node in the tree.
Documentation Wizard
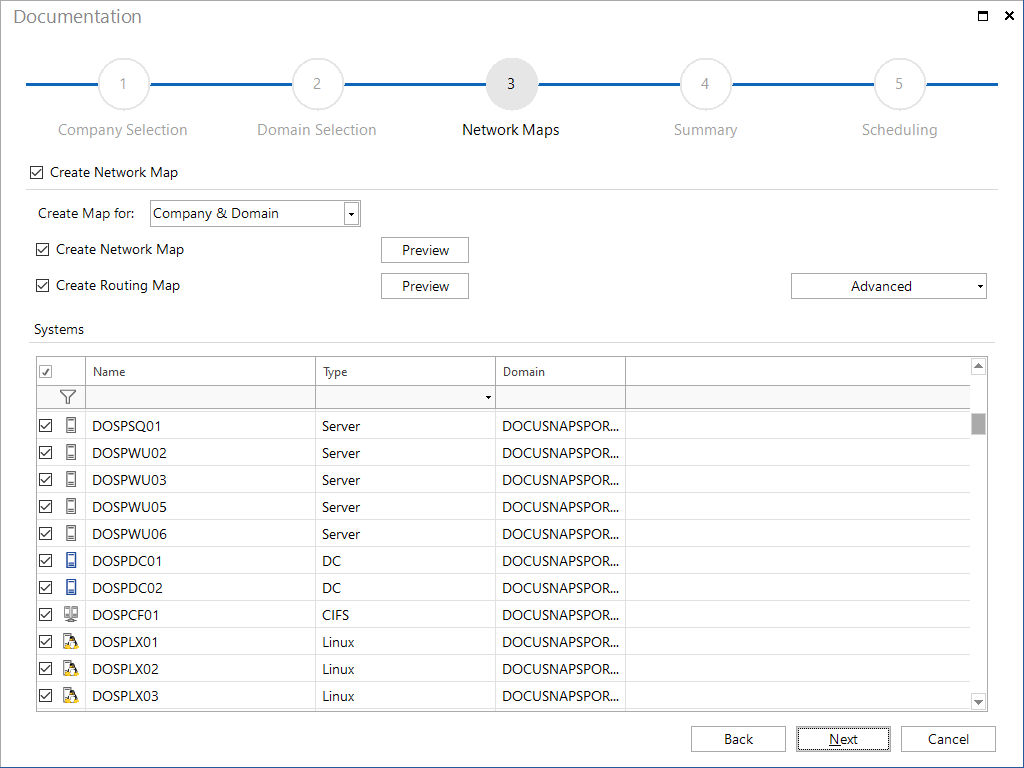
In the Create Map for combobox, you can select whether the maps are to be created for the Company & Domain, for the Domain only, or for the Company only. Only domains selected in the Domain Selection step are considered.
In the maps for the company, all selected domains are combined in one map.
The maps for the company will be stored in the Maps folder directly under the folder with the company name.
(\Documentation Path\Company\maps\network)
(\Documentation Path\Company\maps\routing)
If you create the maps for the domain, the Visio file and the HTML file are saved to the Maps folder of that domain.
(\Documentation Path\Company\Domain\maps\network)
(\Documentation Path\Company\Domain\maps\routing)
When selecting the domain(s), you can also specify whether to include IT assets in the network map or not. If you enable the IT Assets entry, all IT assets where a value of the Network Information type has been defined will be displayed for selection.
On this page, you can specify whether to create the network map and/or the routing map.
All systems existing in the selected domains are displayed in the Systems table. To include a system in the network or routing map, tick the corresponding checkbox. Using the filter in the selection list you can search for specific devices. For more information about filtering, see the Filters chapter. To include only servers, workstations, Linux systems, etc. into your network map or routing map, click the corresponding type. Click again to deactivate this type.
You can create datasheets for the individual systems. These datasheets can be linked to the objects in the network map and the routing map. The options under Advanced, which are also available as preferences in the Options dialog, allow you to specify the formats used for datasheet linking, if desired. The links will be created even if that particular datasheet does not exist yet. This way, datasheets created subsequently will also be linked to the systems in the network map and the routing map.
Docusnap also provides Management tools. For example, you can establish a remote desktop connection to a previously found system. The management tools can also be used with the two map types and the HTML file. For this purpose, a Scripts folder that contains the scripts required for the management tools will be created in the Datasheets folder.
If IT assets with a value of the Network Information type have been defined, they will be shown in the list. To include an IT asset in the network map, tick the corresponding checkbox.

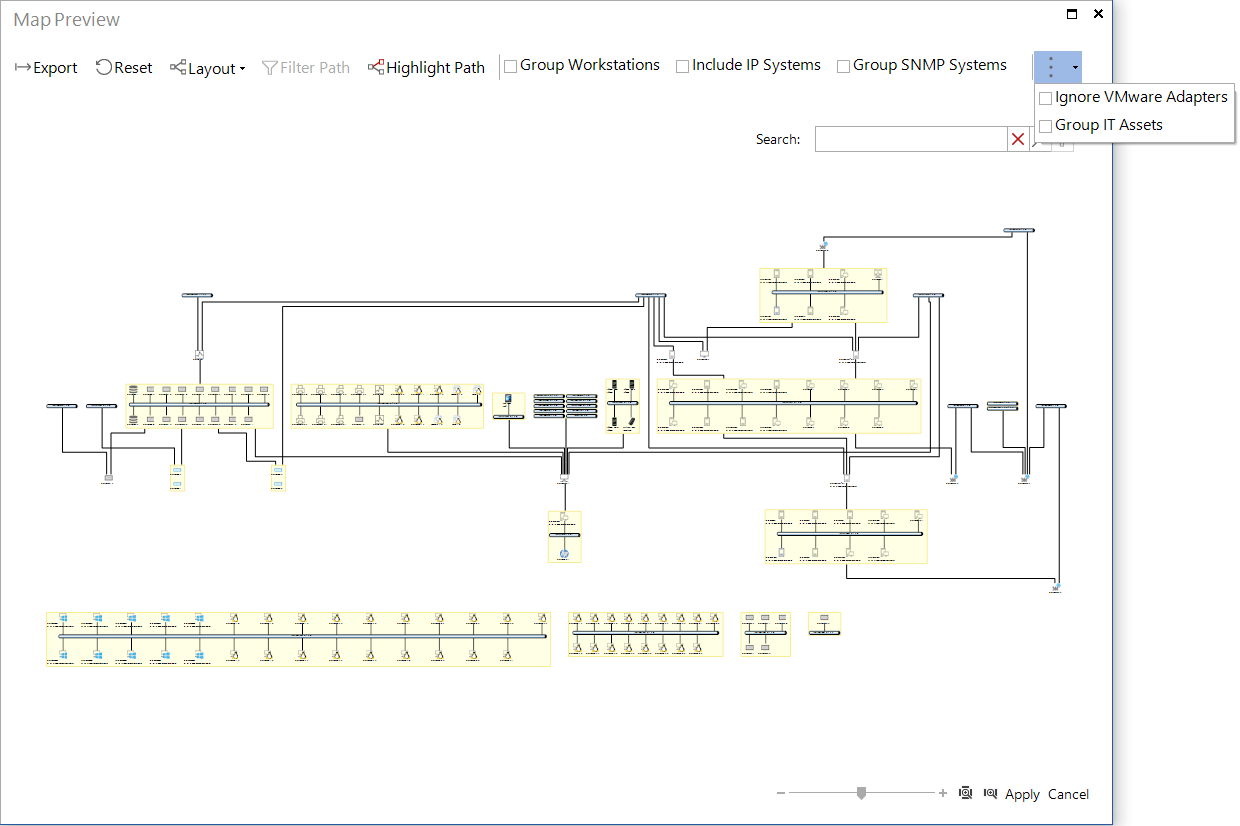
The preview window reflects the layout of the network map or routing map.
Ad hoc map in the tree
The maps can be created by clicking on the Network Map or Routing Map node in the tree.These maps are always created using the current data and are generated each time they are opened. In contrast to the wizard, it is not possible to exclude individual systems. The other optional settings can also be made for the ad hoc plans.
Options
You can change the layout, if required. For most network and routing maps, it is recommended to use the default settings. You can adjust both map types individually:
Network map
To improve the clarity of network maps, all systems can be grouped into the following categories: workstations, servers, domain controllers, macOS systems, SNMP systems, Linux systems, IP systems, and IT assets.
For systems grouped by IP ranges, dedicated maps are created. In the main network map, a placeholder object is inserted to represent these systems. In the ad hoc map within the tree, the associated detailed map can be opened via the object’s context menu and selecting the pagelink. For maps created through documentation, the detailed map can be opened by clicking on the object.
Two other options allow you to include IP systems and ignore VMware adapters. Details about the individual computers that are present in the network will be displayed on an additional datasheet.
If the performance improvement option is active (default, set in the options) and the infrastructure includes more than 500 objects, objects of type Workstation and IP System are automatically excluded for performance reasons, regardless of the selected map options. Since these objects are not included in the map in this mode, the grouping options for workstations and IP systems are also not offered once the 500-object limit is exceeded.
By enabling the Group IT Assets checkbox, you can group all IT assets and output them as a single object.
In the HTML view of the map, the various datasheets will be displayed as links in the left pane of the browser. The Visio file and the HTML file will be stored in the Maps folder.

Routing map
The routing map preview provides a checkbox that enables you to ignore the VMware adapters.
