Configuration in Docusnap
4 minute read
A Docusnap Discovery Service is in Docusnap linked to a client (paired). This is necessary so that the inventoried data can be mapped to the appropriate clients. As part of the pairing process an own encryption for the data exchange is defined as well.
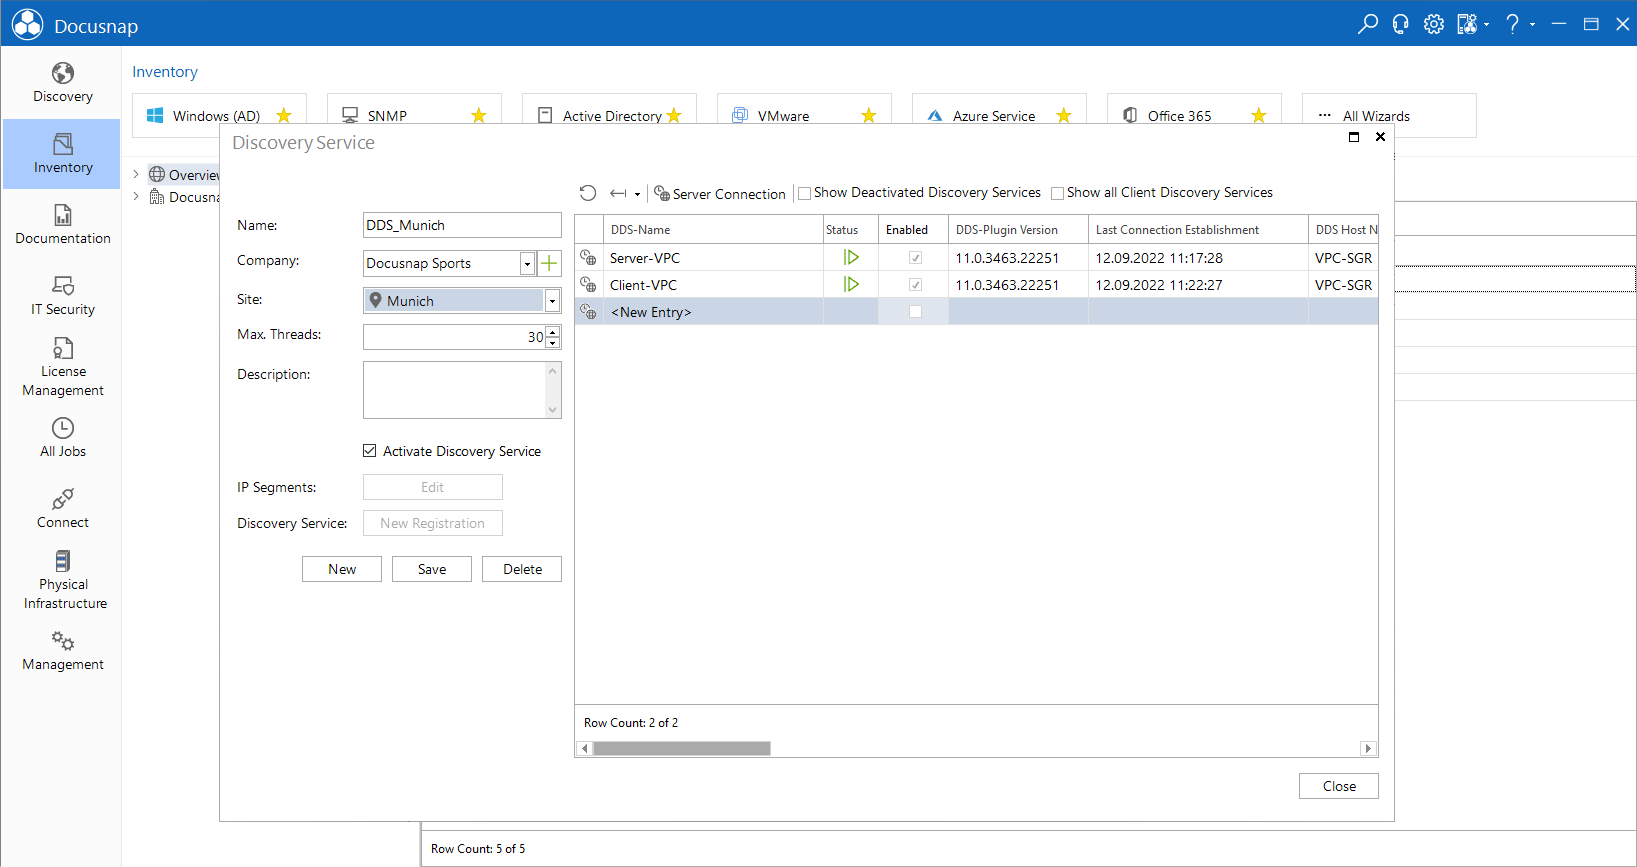
The configuration of the Docusnap Discovery Service is started via the Docusnap Client in the title bar General -> Docusnap Discovery Service Configuration.
In this dialog the most important system information as well as configuration data of all existing DDS installations are displayed. The activated filter function can be used to filter content. The integrated export function allows further processing in Excel.

A new service is created by clicking the New button. The name for the Docusnap Discovery Service is specified and the desired company, in which the data should be is to be displayed later, is selected.
In order to accelerate tasks such as inventorying Windows systems, Docusnap performs multiple tasks in parallel. By default, 30 concurrent processes can be performed. These can be adjusted in the Max. Threads texfield. IP segments can be optionally specified to inventory processes to subnets.
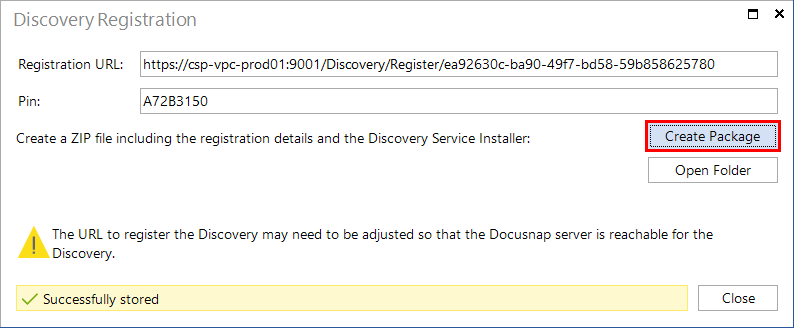
Saving the new Docusnap Discovery Services opens a dialog with which a complete installation package can be generated as a zip file. This zip file installation is then carried out on a computer on site, which should be inventoried.
Create Installation Package
Registration URI
Important: Should the Docusnap Discovery Service be installed at a remote site, the URL must be adapted accordingly. This can be subsequently edited while configuring the Docusnap Discovery Services.
Create Package
Clicking on the button Create Package the Docusnap Discovery Service Setup including pairing data is stored in a zip file.

Import
With the New button Discovery Services can be created individually. However, if many DDS are needed, the creation can be time consuming. The Discovery Service Import can therefore be used to create several DDS at the same time. Click on the Import button to open the dialog. The button is only active when the Docusnap Server is started.
A CSV file can be selected by clicking on the  button. In the CSV file, the values must be separated by “;” in the following order: Discovery Service Name (any name for the DDS), Company (Name or AccountID of the company to which the inventoried data should be stored), Site (Name or SiteID of the site, can remain empty), Max Thread (maximum number of threads for the scan). Docusnap assumes that the first line of the CSV file contains headings and therefore the first line is not included in the import. Click the Import button to import the entries as DDS.
As an alternative to CSV import, Discovery Services can also be created using the Add button. By clicking on the empty field in the Discovery Service Name column, the name for the DDS can be specified. An existing company can be selected in the Company column. In the column Location a location of the selected company can be selected. The maximum number of threads can also be adjusted.
Click the Delete button to delete the selected entry from the list.
Click the Save button to save a CSV file. This file contains the URL and the pin for the registration of the DDS. After the dialog has closed, the DDS are added to the list.
Server Connection
The Server API connection is necessary for scheduling and processing jobs for Docusnap Server and Discovery Service. The URL must match the Docusnap Server setting in the Server API step. If there is no server connection, Discovery Services cannot be created.
Deactivated Discovery Services
When a Discovery Service is selected, it can be disabled and enabled using the Activate Discovery Service checkbox. Clicking the Show Deactivated Discovery Services checkbox displays all disabled DDSs so the can be reactivated.
Client Discovery Services
Each Docusnap installation contains a local Discovery Server. It can be used to perform inventories without having to configure the Docusnap Server. By clicking on the Show all Client Discovery Services checkbox, all other client DDSs connected to the same database are displayed in addition to the local DDS of the current system.