ADDS Comparison
3 minute read
The ADDS Synchronization feature compares the inventoried systems with the systems existing in the Active Directory. When this process has completed, Docusnap will display the computers that are no longer present in the Active Directory system, but still listed in the Docusnap database. From that dialog, you can determine whether these computers are to be deleted from the Docusnap database as well or not. Docusnap will not modify the Active Directory system.
To start the wizard, click the ADDS Synchronization button in the Inventory area.
Company Selection
In the first step, select the company where the domain to be synchronized is located. As this process consists in comparing data from an existing company, you cannot create a new company from the ADDS Synchronization wizard.

Authentication
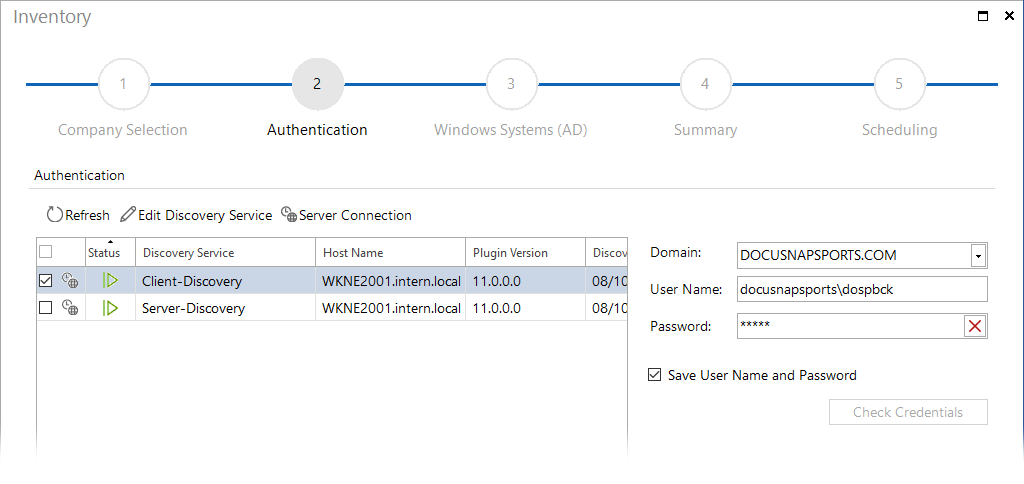
In the second step, you need to select the domain to be synchronized. Select the desired domain in the Domain combo box. Then, enter valid credentials for this domain in the User Name and Password fields. Next, you need to check whether the user is a member of the domain and the password is correct by clicking the Check Credentials button. Only if this check is OK, the Next button will be available. If you do not specify a user name, the authentication will be performed based on the current user’s login data. If you enable the Save Username and Password checkbox, this information will be stored for the next synchronization process.

Windows Systems
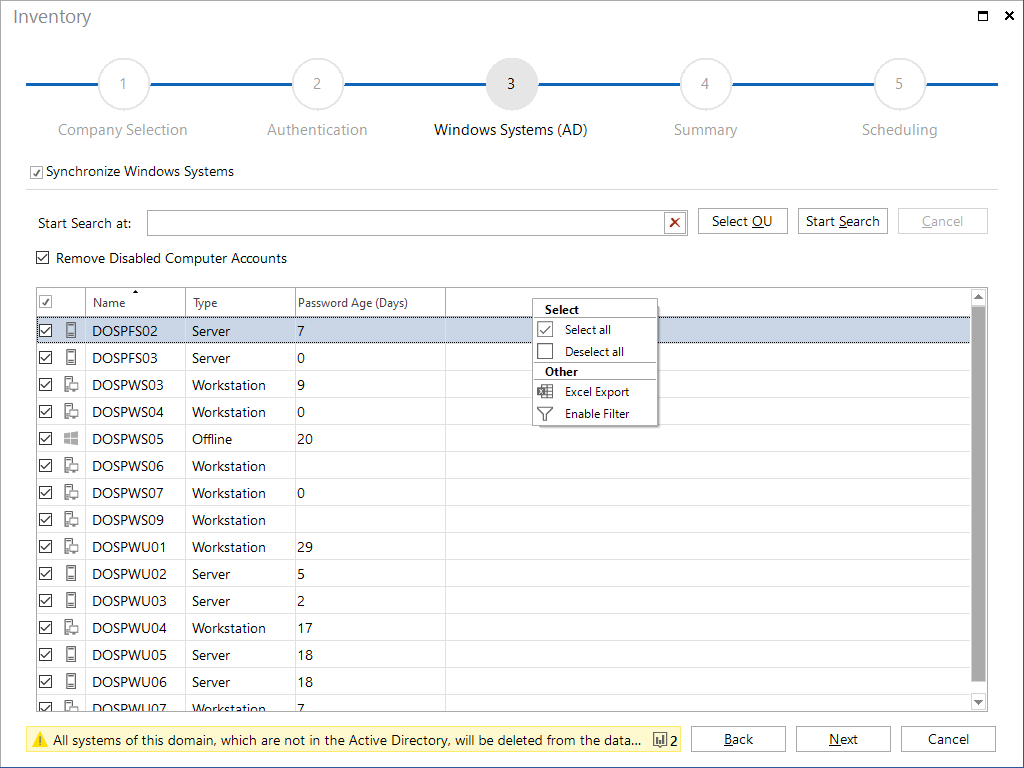
When you click the Start Search button, Docusnap will compare the inventoried Windows systems with the Active Directory system. To abort this process, click the Cancel button.
When the search is complete, all Windows systems that have been scanned by Docusnap before, but no longer exist in the Active Directory system, will be displayed in the table. If the checkbox next to a system is enabled, this system will be deleted from the Docusnap database in the next step. By default, all systems are selected.
The table can be filtered using the Filter functions. For more information on filtering, see the Filters section.
Under Select, you can either select or deselect all devices.

All systems of a domain that have been scanned during an IP Segment inventory process or that belong to a system group will also be deleted.
For this reason, it is recommended to create a separate domain for system groups if you do not want to delete them.
Summary
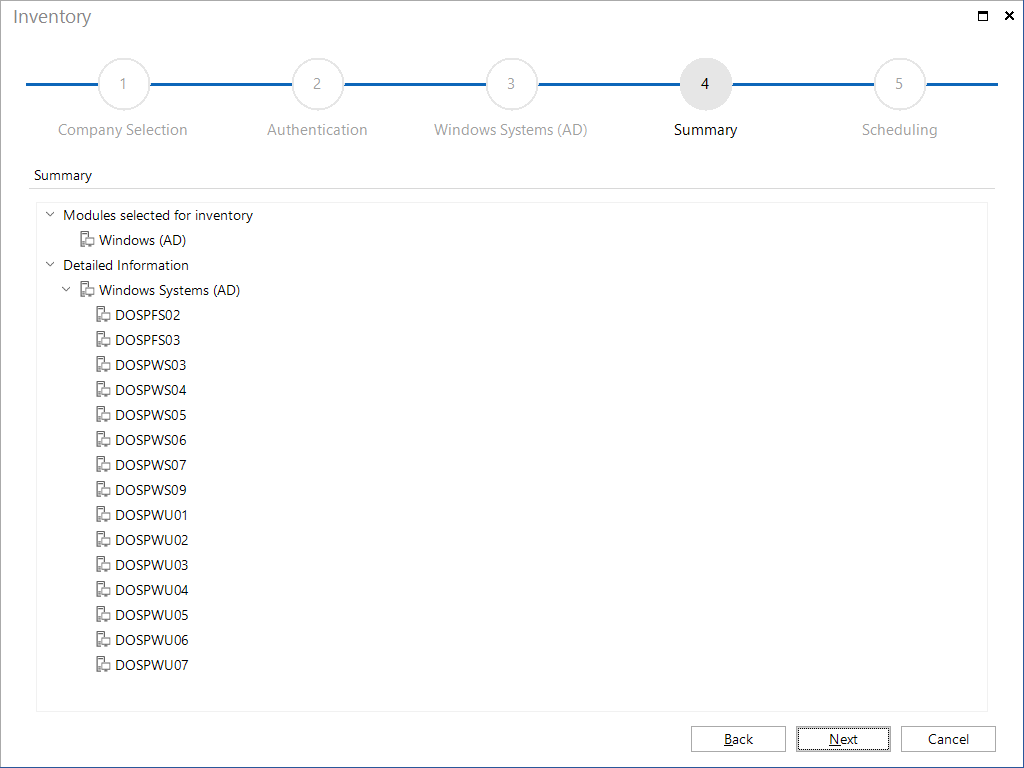
When you click the Next button, the next step displays where you can see all systems marked for deletion.

Scheduling
Through Scheduling, you can specify that the ADDS Synchronization routine will start automatically at a later point in time. In the Scheduling step, you can define whether the ADDS Synchronization routine will be a one-time or a recurring event. Please note, however, that this feature can only be used if the Docusnap Server is installed on a system in the network.
Status
Once you started deleting the devices, the dialog will display the progress of the deletion process. To abort this process, click the Cancel button. All systems with the Completed status have been deleted from the database. Systems for which the deletion process has not been completed yet remain in the database.
Final Report
On the Report page, you can see which computers have been deleted successfully. To close the wizard, click the Close button.