Create IT Documentation
6 minute read
Editor
For creating and editing of the IT documentation frameworks a separate editor is provided. Once the IT Documentation heading or an underlying node is selected, the editor can be opened in a separate window by clicking the button Open Editor in the action bar.
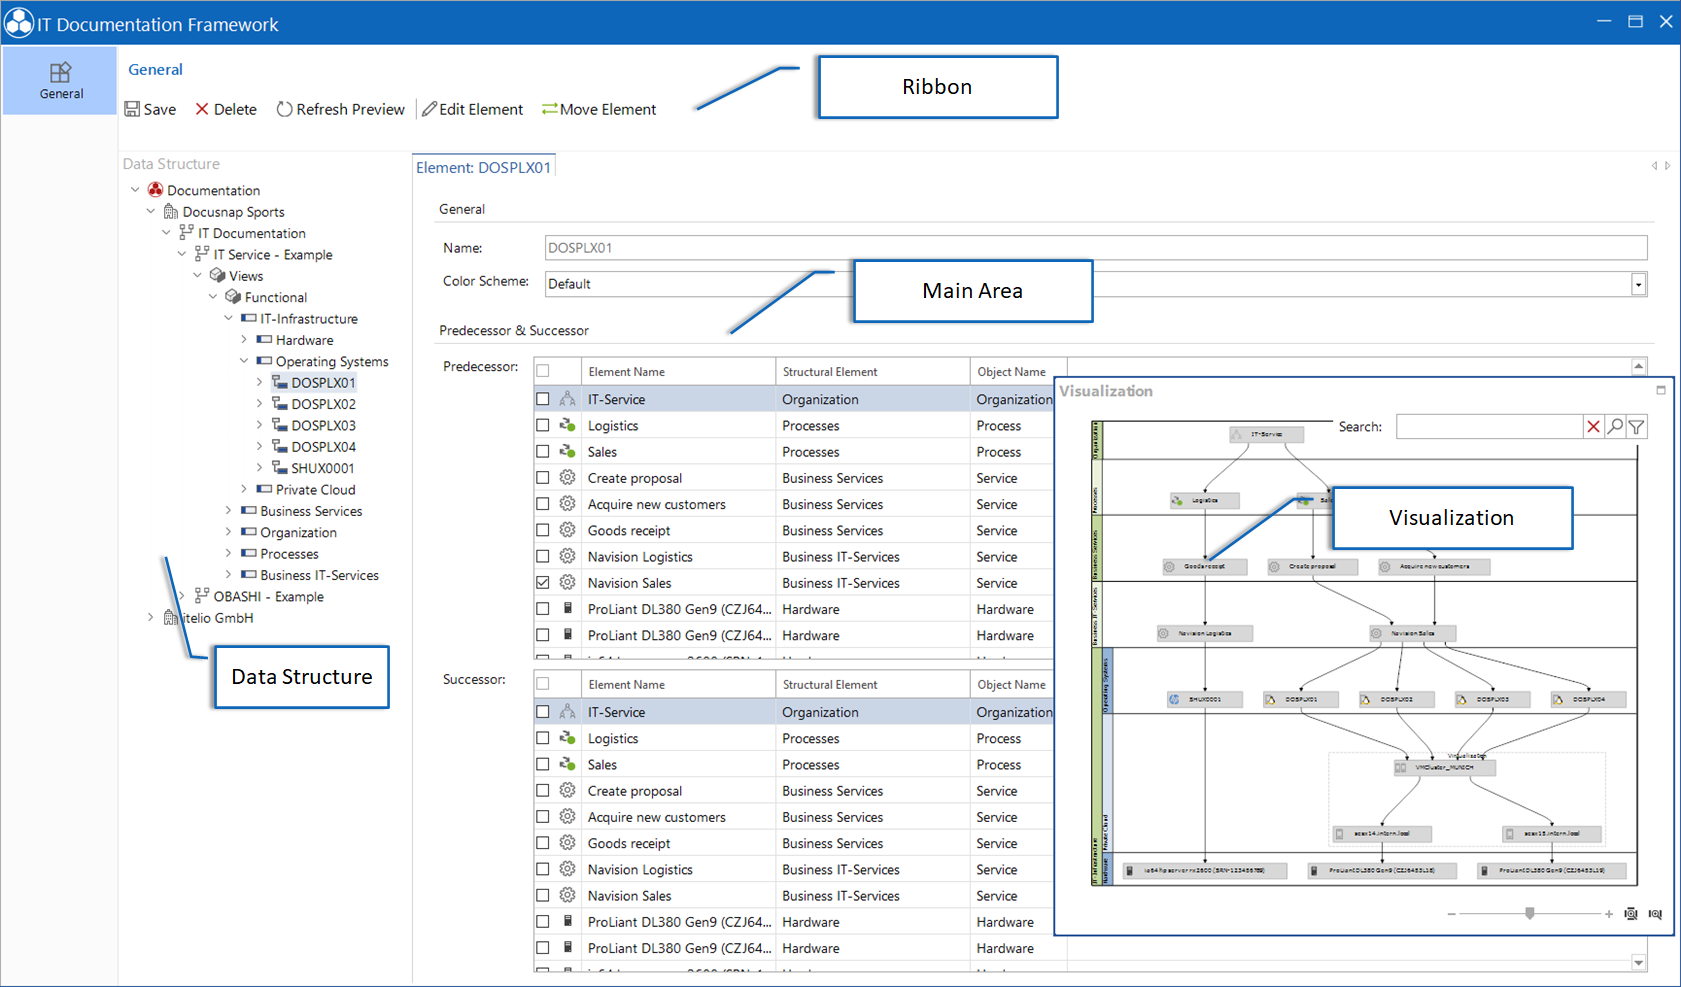
The left pane displays a data structure that displays all existing IT documentation frameworks. The appropriate buttons are made available in the ribbon, depending on which node was selected in the data structure. For example, when a view is selected, the Add New Level button is displayed. In the main area the data entry screen is displayed for the selected node. In addition, there is the Visualization window. In this windows a preview of the business structures is created immediately after saving of every change of the structure.
Creating a new framework
The first step in creating the documentation is to create a new framework. This is the top level of this documentation. This can be applied in two ways. Either directly in the tree or via the editor.
If the IT documentation heading is selected in the Documentation tree, a framework can be created for the respective company. Click the New button to open the data entry screen. Once a name has been assigned to the framework, it can be created by clicking the Save button.
Alternatively, all objects can be created via the editor from the beginning.
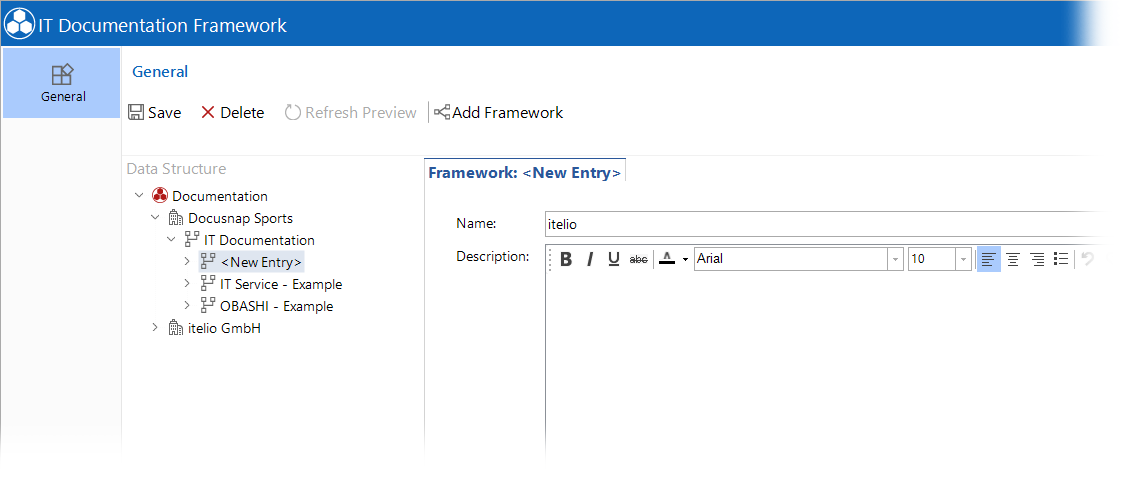
After the IT Documentation heading is selected, the IT Documentation ribbon is displayed. By clicking on the button Editor, a separate window is opened and a new framework can be created using the Add Framework button.
Create views
Again, a new view can be created directly from the Documentation tree or from the editor.
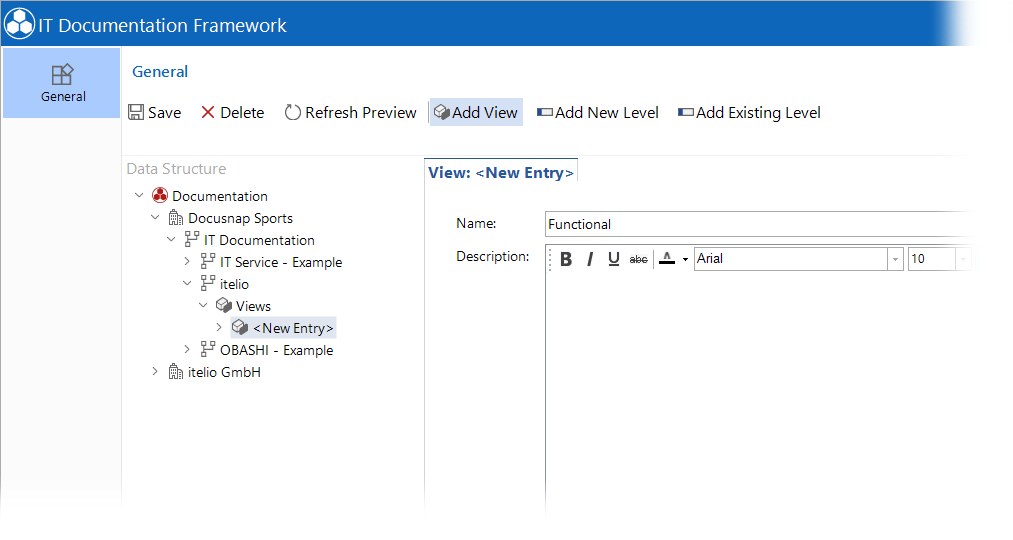
In the editor, the Views node must be selected for the respective framework, and then click the Add View button in the ribbon. A name for the new view must be entered in the data entry screen and then click on the Save button.
Create levels or add existing levels
Levels can only be created in the editor. However, once created, they can be edited in the documentation tree.
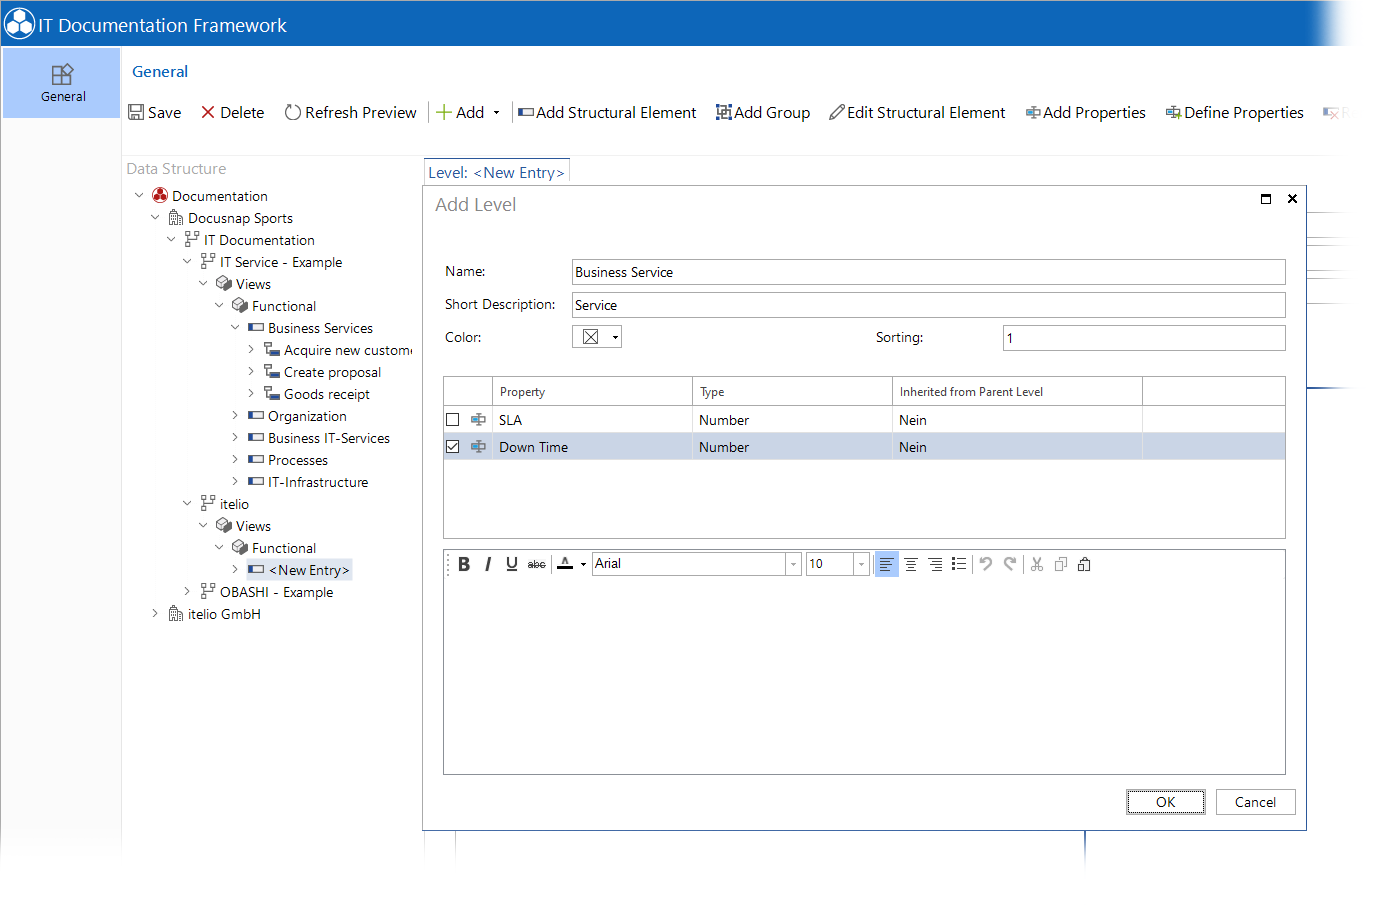
In the editor, a created view is selected in the data explorer and a new level is created by clicking the Add New Level button. In addition to the name, a color can also be selected for the level, which will be used in the visualization. Use the Sorting field to specify the order in which they are to be listed, starting with the value 1. It is recommended to use 10-step steps instead of 1-step steps for sorting. In case of re-sorting this makes it easier, if there are multiple levels. When a property is selected, this value can be set for all elements associated with this level.
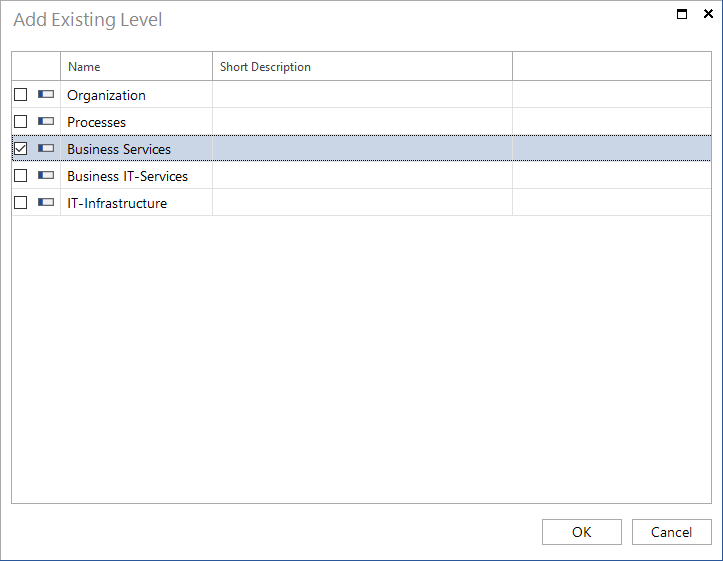
If levels have already been created in another view, these levels can also be assigned to the currently selected view using the Add Existing Level button.
Create structural elements
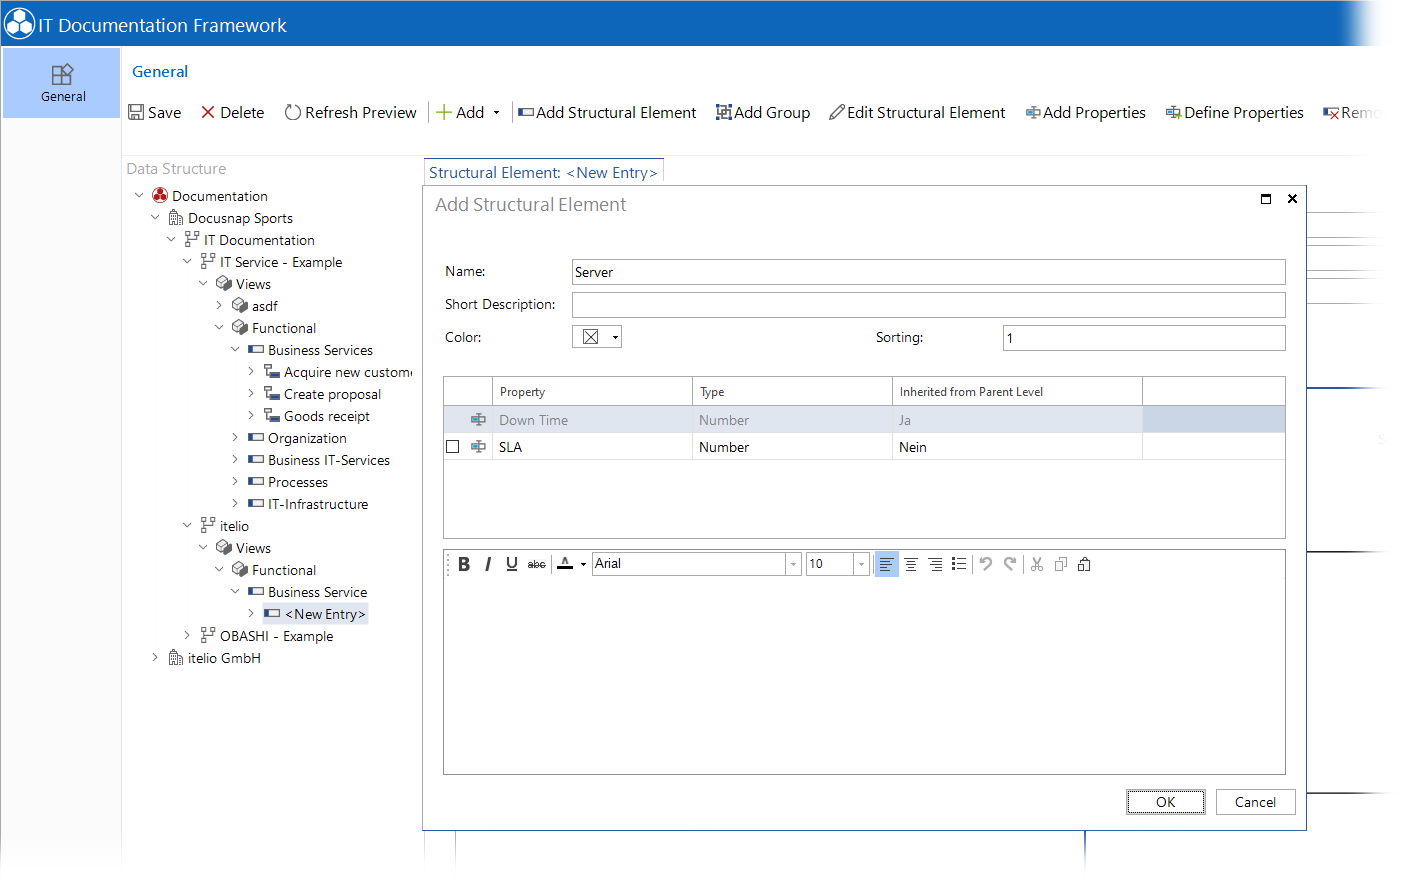
Levels can be divided into structural elements. The structural elements can also contain additional structural elements. Once a level or a structural element has been selected, a new structural element can be created by clicking the Add Structural Element button. As with levels the output in the map is defined by the color and the sorting. If a property is selected, it can be specified for all elements of this structural element.
Add, link, and move elements
The Add Elements button opens a window where you can select inventoried or already manually created items from the Inventory tree. These are added to the level or the structural element that has just been selected. If you want to assign elements to a different level later, they can be moved.
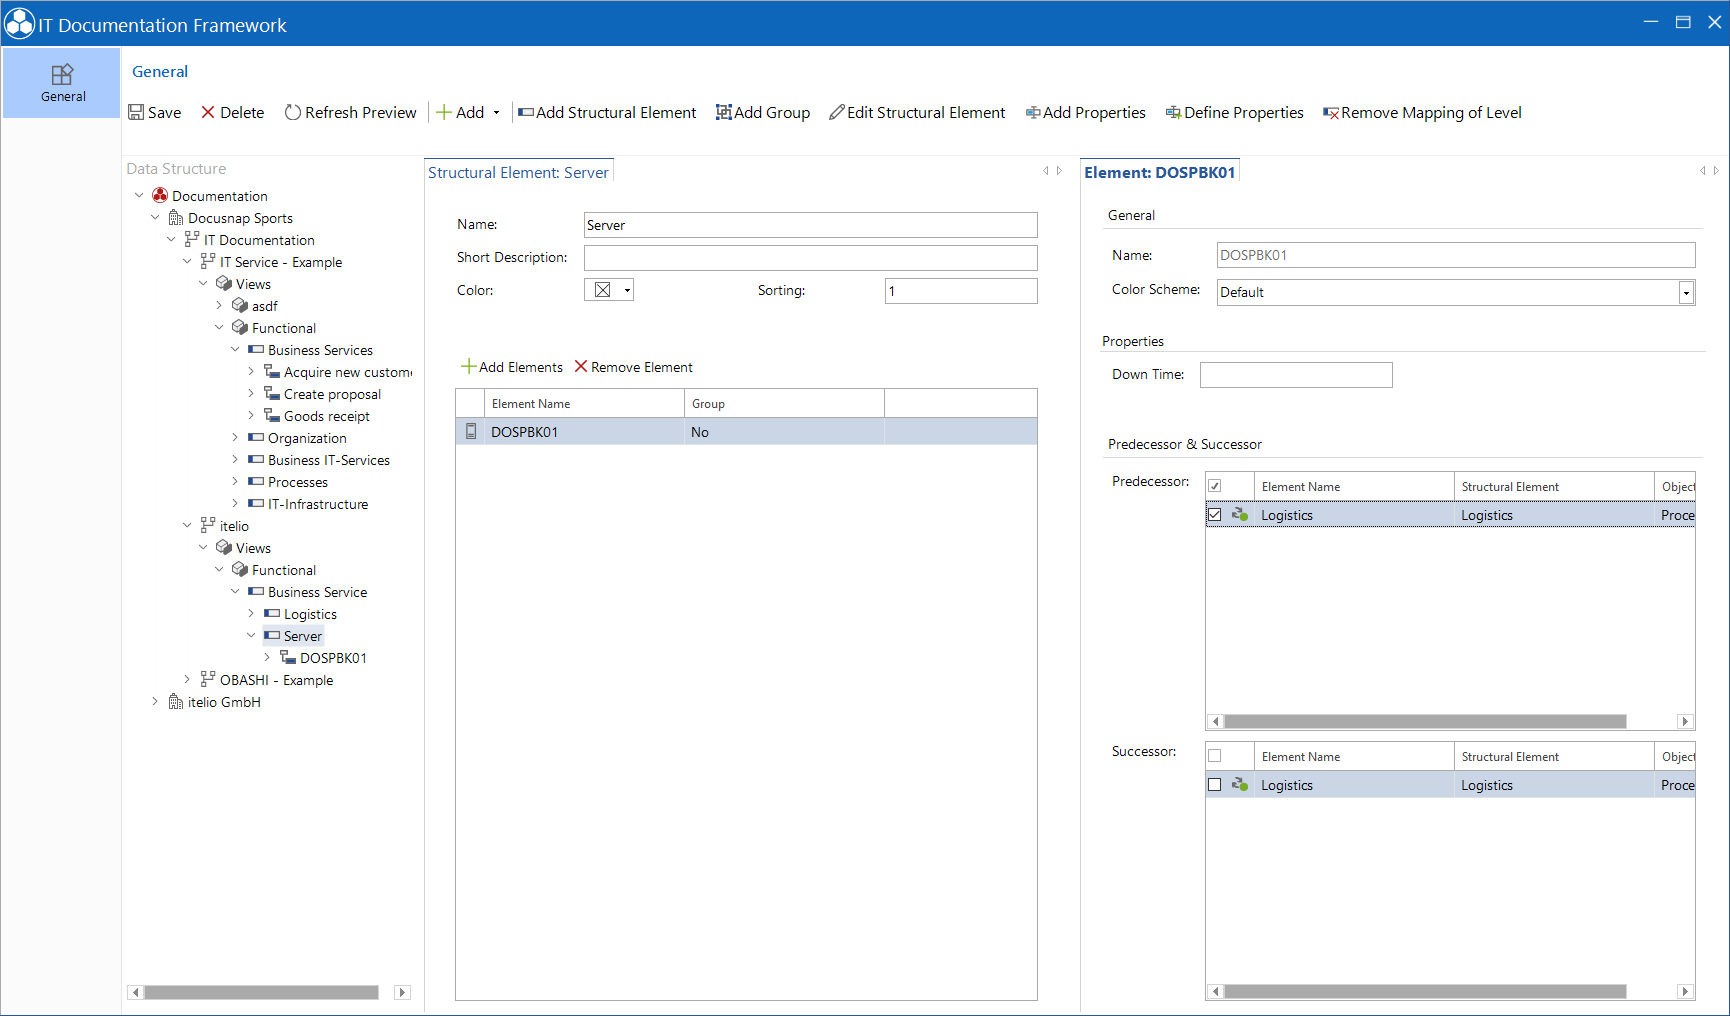
In order to display dependencies, the elements must still be linked to one another. To do this, the corresponding element must be selected and the predecessors or successors selected in the right pane. Depending on whether an element indicates that it has a predecessor or successor, the arrow direction of the link arrow changes.
If it is determined that an element should be listed at a different level, it can be reassigned by the Move Element function. To do this, first select the appropriate element in the tree and click the Move Element button in the ribbon. In the window Move Element you can select the level, the structural element or the group into which the element should be moved.
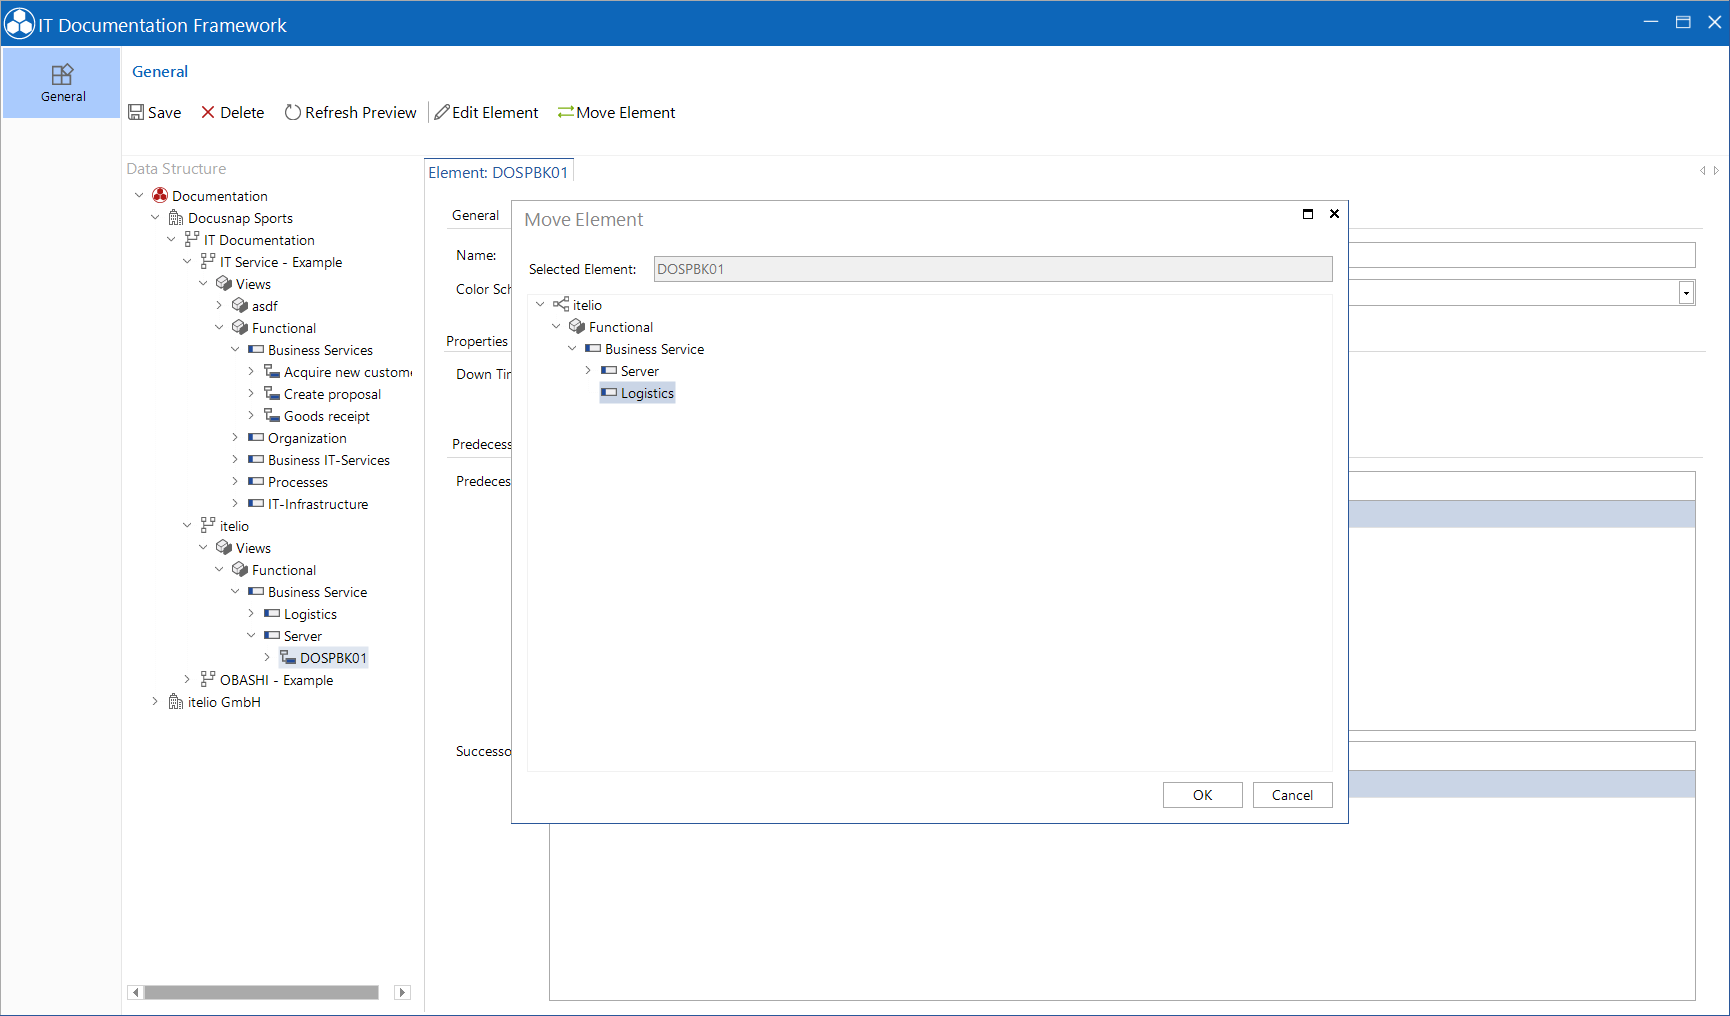
When elements are added and then the original object is deleted, the elements in the level still exists. If these elements are also to be deleted, they must be deleted from the IT documentation.
Some objects can be moved in the data explorer. For example, systems that are moved to another domain, systems that are changed from offline host to Windows systems, or IT assets that are placed in a different folder.
After an object has been added as an element, it is deactivated in the Add Elements dialog so that it can’t be added again. By moving the object, it is no longer linked with the IT documentation and the object remains active in the Add Elements dialog therefore the same object can be added a second time.
Service, process and organization
Not all elements that are required for the modeling of the business structures can also be obtained with the inventory. Therefore, service, process, and organizational elements can be created manually. These elements can be created in the editor if a level or a structural element has been selected in the tree. The created element is immediately assigned to the selected level or to the selected structural element.
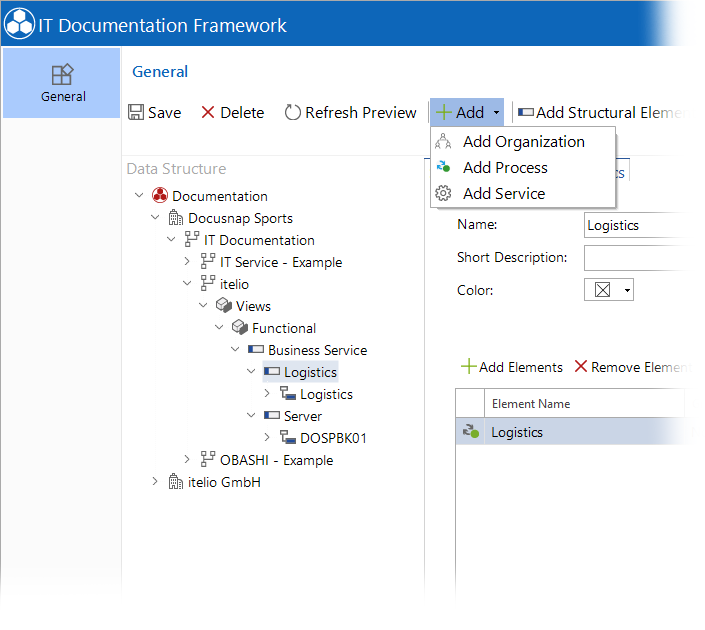
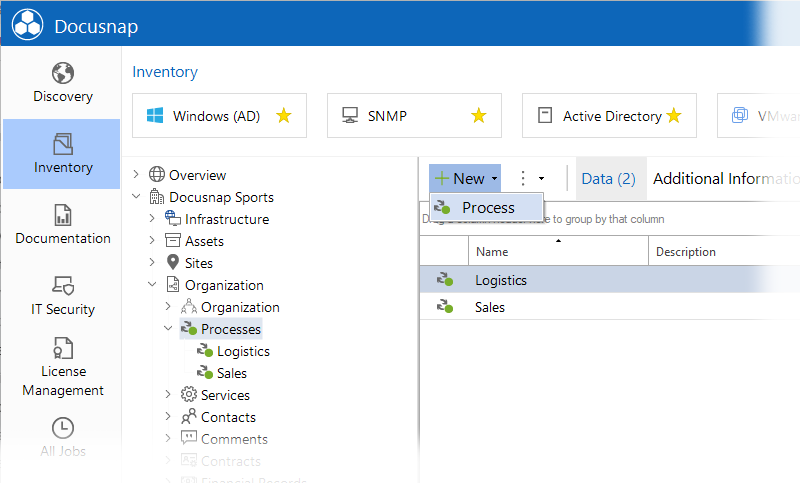
The service, process and organizational elements are also listed in the inventory tree below the heading Organization for the respective heading. The elements can also be created and edited at these nodes. They can then be used in the IT Documentation Framework.
Create and link groups
Groups can be created within levels and structural elements to better organize elements. Clicking the Add Group button opens the window for creating a group.
After the group has been created, elements can be added. If already created elements are to be added to a group, they can be moved to the desired group using the Move Elements button after the element has been selected.
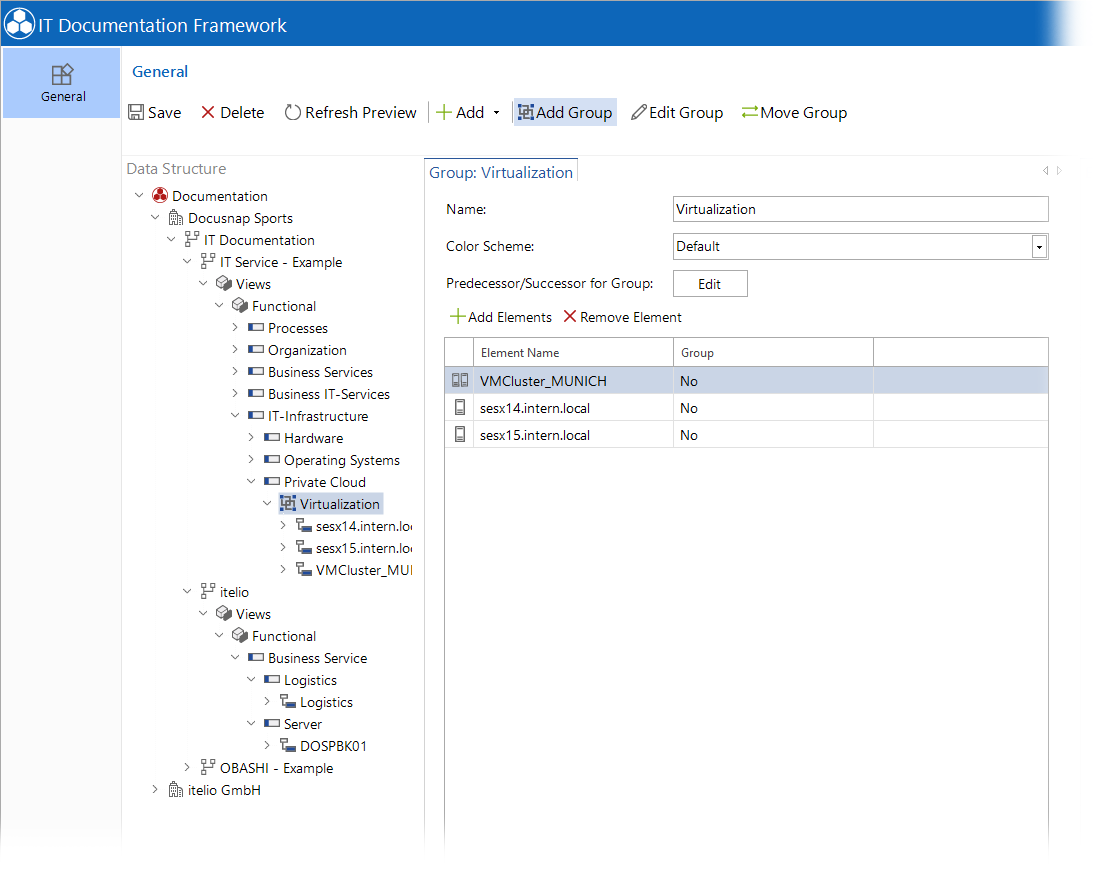
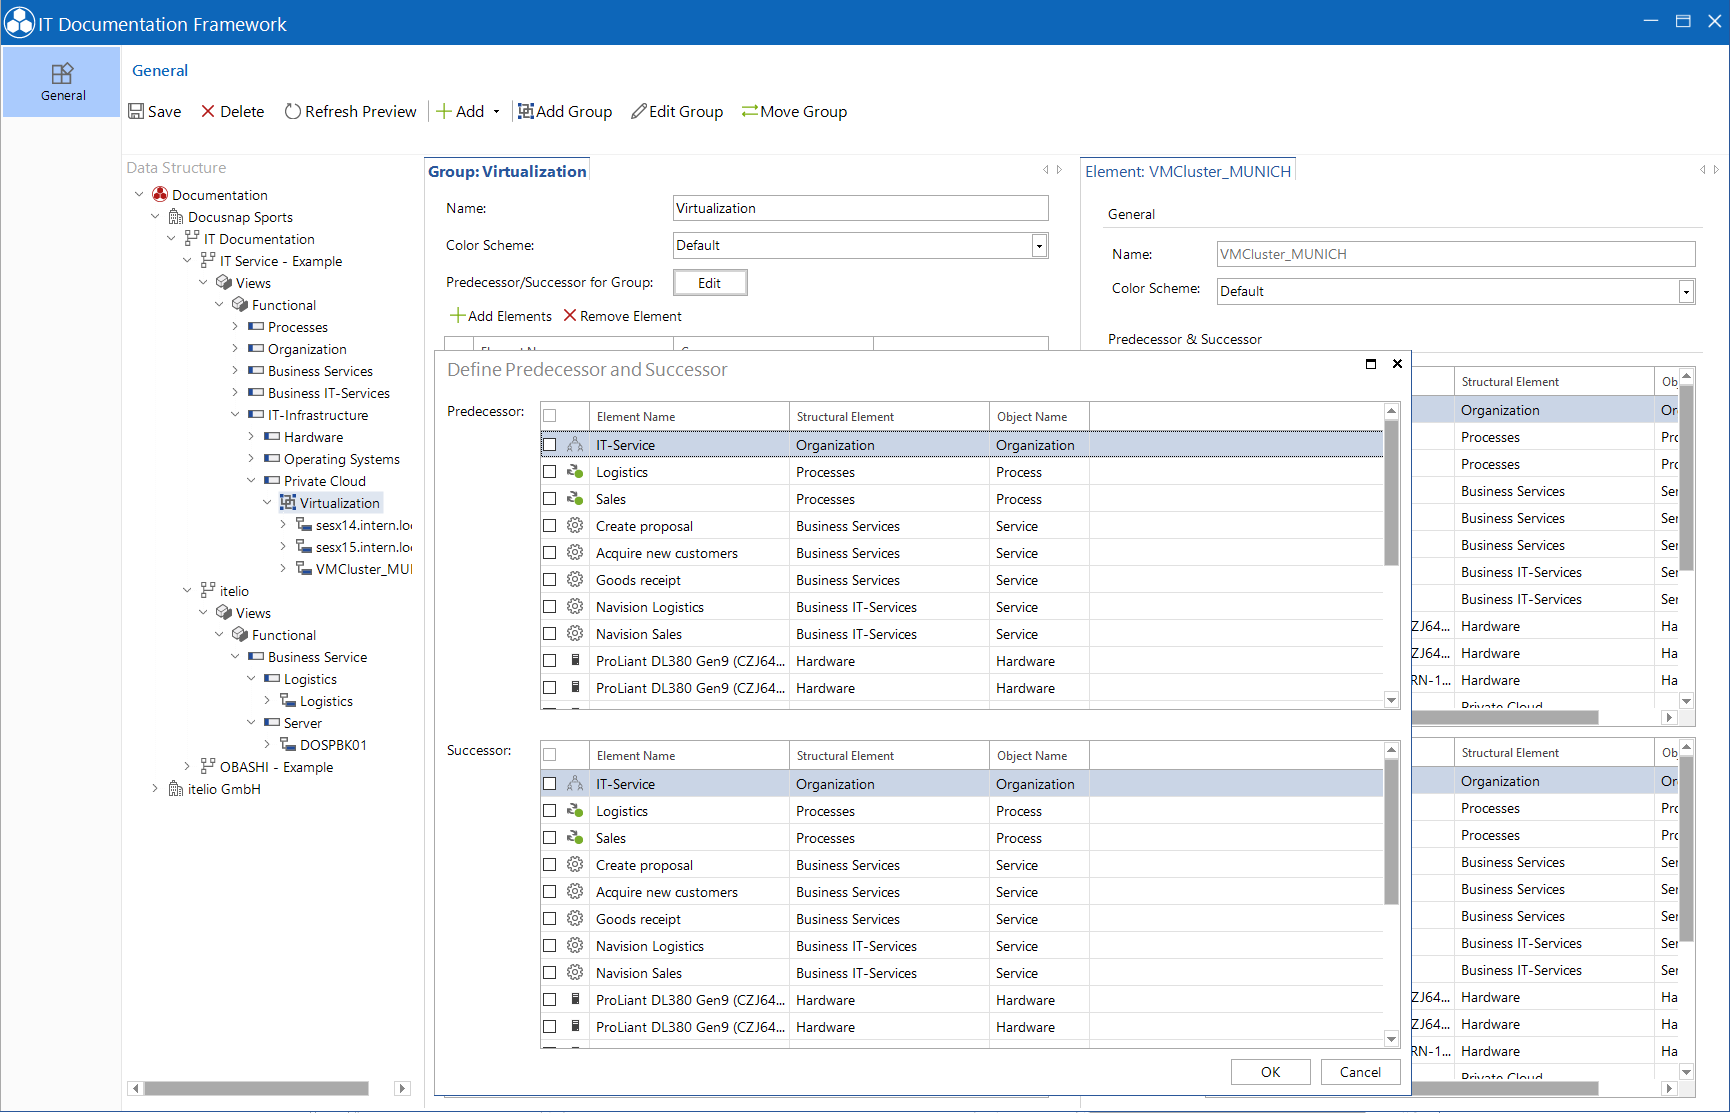
It is possible to define the links between the individual elements, between an element and a group or a group and a group. Clicking on the Predecessors/Successors for Groups Edit button opens a window to select the objects to which this group should be linked. You can select elements or groups. By clicking the Edit Group button, the group can be opened for editing. In this window the links of the group can also be adjusted.
