Notifications
2 minute read
Click the Notification button in the All Jobs area to open the Notification wizard.
This wizard allows you to set the interval for criteria checks and to specify the intended e-mail recipients.
The first step is to select the company. By selecting the company, you determine which company will be used for the SQL Statement.

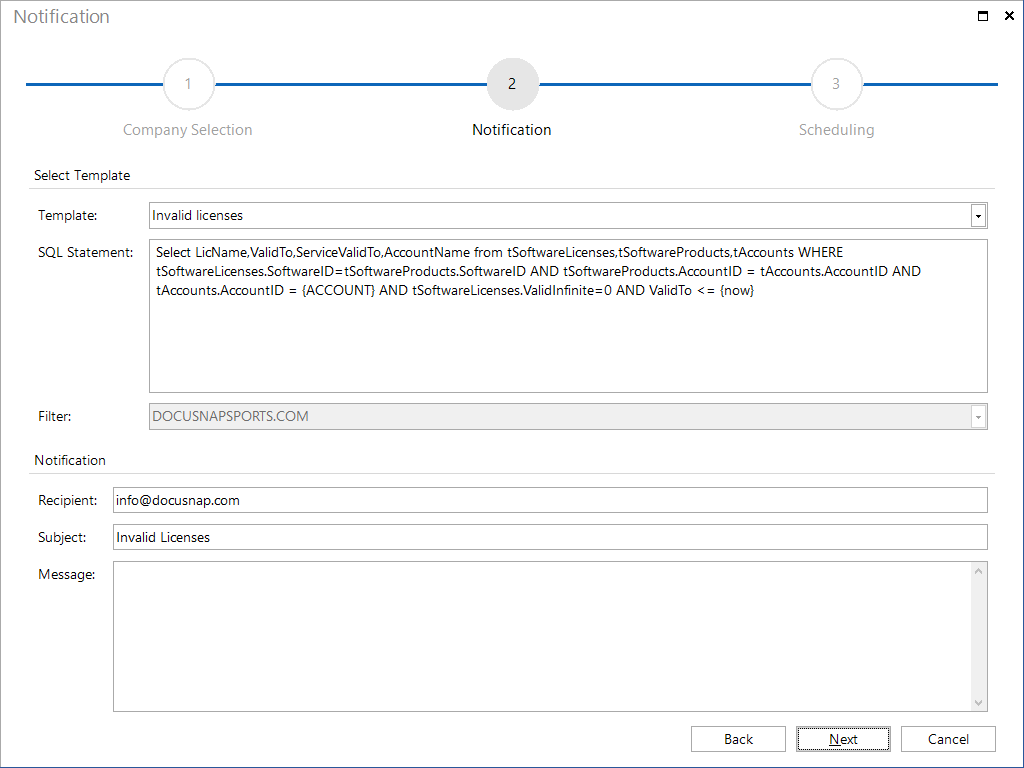
Here, you define the notification to be sent. The Template drop-down list offers some predefined notification types for selection. In the SQL Query field, you can see which SQL statement will be used for the selected notification type. If the {Domain} variable is part of the statement, you must select a filter. A domain must be selected for the {Domain} variable. Only domains for the in the first step selected company will be displayed as filters.
Specify the e-mail address of the intended recipient in the Recipient field and the subject of the notification in the Subject field.
Then, enter the body text of the notification in the Message field.
The results from the SQL statement will be attached to the e-mail as an Excel file. If the execution of the statement does not return a result set, no e-mail will be sent. This could be the case, for example, if the program checks for invalid licenses and none of the license expiration dates is earlier than or matches the current date.

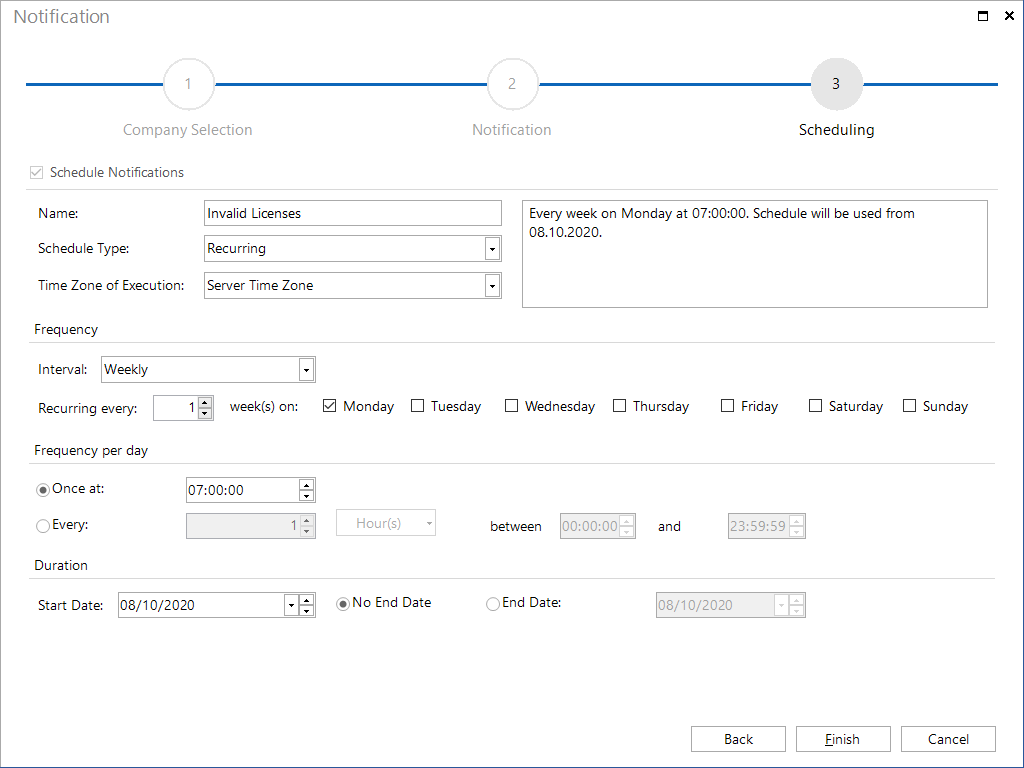
In the next step, you can define scheduling details. Scheduling allows you to define the date(s) and time(s) for execution of the SQL statement.
