Grouped Reports
7 minute read
Computers grouped by Operating System
This sample report will include all computers grouped by their operating system.
The computers are found in the tHosts table and the operating systems in the tDocuWindows table. Due to the relationship between the tHosts and tDocuWindows tables, a given computer may have multiple entries in the tDocuWindows table, because it may have been scanned several times. In a report designed on the basis of relations, it is possible that multiple detail components exist for each master component. In this report, the tDocuWindows table would be the master component and the tHosts table would be the detail component, as the computers will be assigned to the operating systems. Since there may be several entries in the tDocuWindows table (master component) for each computer (detail component), this report cannot be resolved using native database relations. In this case, you need to create a virtual table using an SQL statement. It will invert the physical structure and generate a corresponding list.
SQL Statement
When you create a new report, all existing database tables are loaded into the report. For this report, however, a table is required that does not exist in the meta tables. For this reason, you must create this table in the Report Designer using an SQL statement.
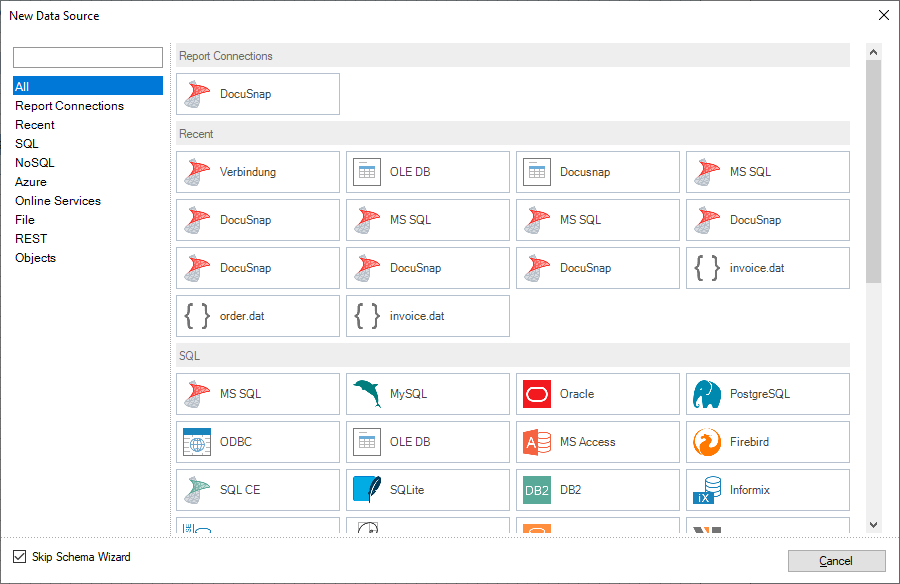
First, add a new data source. To do so, go to the Dictionary tab and click the  button or right-click to open the context menu and select New Data Source. As the connection, select DocuSnap.
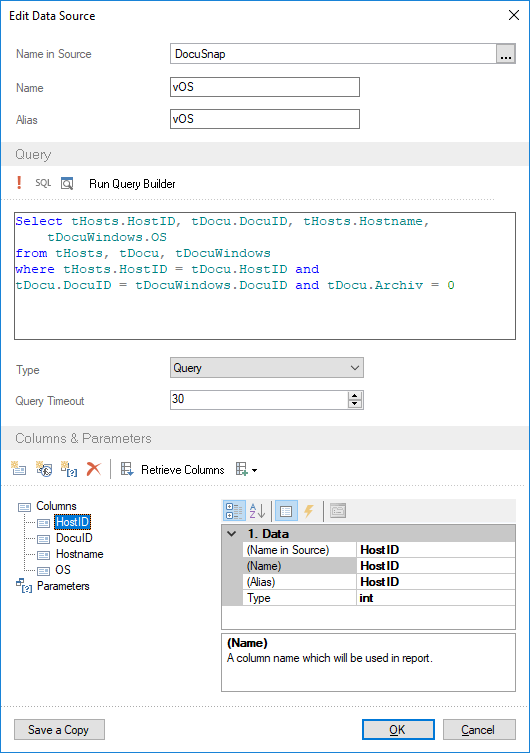
From this dialog, you can create the new data source. The correct database has already been entered as the name of the data source. The table name can be chosen freely. We recommend to prefix the name of the table with a lowercase “v” for “virtual”, to distinguish this table from those already created. For this report, name the table vOS. The Alias field is automatically populated with the same name. By clicking the  button, you can validate the SQL statement you entered. To open a text editor where you can enter the SQL statement, click the
  button. The data retrieved by the SQL statement can be displayed by clicking the
  button. Enter the SQL statement in the Query Text field. You can enter any SQL statement desired in the Query Text field as long as it relates to tables and columns that exist in the database. When you are done entering the statement, add the columns by clicking the Retrieve Columns tab. The table columns are displayed in the Columns field. When you select one of the columns, its properties are displayed to the right of the selected column. When you add a column, the primary key is defined as an int data type. For existing database tables, the primary keys are of the long data type. When you create a relation, make sure that the related columns are of the same data type. For this reason, change the primary key for new tables to the long data type.
For this report, a table that combines data from the tHosts and the tDocuWindows tables is required. There is no direct relation between the tHosts and tDocuWindows tables. The connection will be made through the tDocu table. The tDocu table is linked with the tHosts and tDocuWindows tables. The tHosts table is linked with the tDocu table by means of the HostID column. The relation between the tDocu and tDocuWindows tables is created through the DocuID column.
For the new table, not all columns from these tables will be needed. Therefore, select only some of them. For the output, the computer name (Hostname column) and the operating system (OS column) are required. It is a good idea to specify the primary keys of the tables for the output fields of the SQL statement, although they do not actually appear in the report. In addition, the tDocu table has a special feature. Assume that you want to limit the report to the most recent data. However, each computer may have been scanned multiple times. To obtain only the current information, you can use the Archiv column in the tDocu table. For the most recent scan in the Archiv column, the value 0 (zero) will be set. By using the Archiv = 0 Where condition, only the current data will be added to the new table. The resulting SQL statement connects all necessary tables:
Select tHosts.HostID, tDocu.DocuID, tHosts.Hostname, tDocuWindows.OS
from tHosts, tDocu, tDocuWindows
where tHosts.HostID = tDocu.HostID and tDocu.DocuID = tDocuWindows.DocuID and tDocu.Archiv = 0
When you click the Retrieve Columns button, the columns you indicated in the SQL statement will be retrieved from the database. Both HostID and DocuID are primary keys. For this reason, the data type needs to be changed to long. Click the OK button to close the dialog. Next, select the newly created table, vOS, under the Queries node in the Select Data dialog. Click OK to add the table to the Dictionary. The vOS table now appears on the Dictionary tab.
Creating a Group
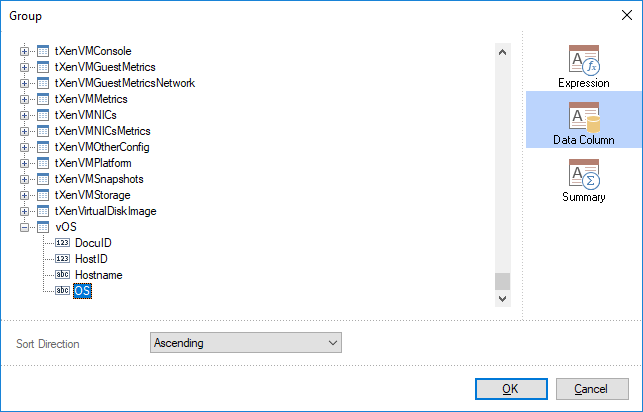
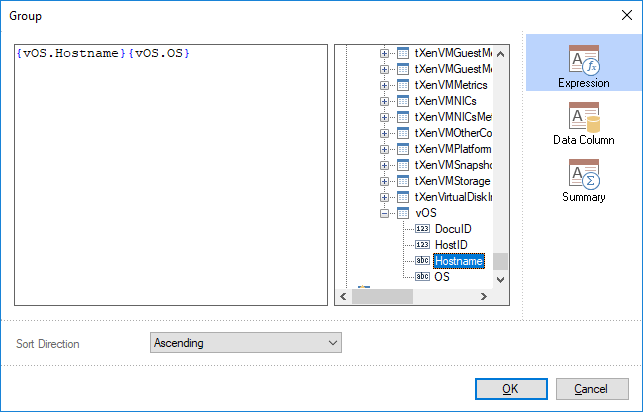
To group the data of a table, add a group header band to your report. Group header bands can be added from the Toolbox. Open the the Group Condition dialog to do so. Here, you can specify the column on which to group your data. For this sample report, select the operating system (OS column) from the vOS table. You can also specify whether the group should be sorted in ascending or descending order or not at all.
If you want to use more than one column for grouping, open the Expression page. On this page, you can add multiple columns. Thereby, only those records that match the selected expression will be output as a group. To apply the condition to the group header band, click OK.
Group Output
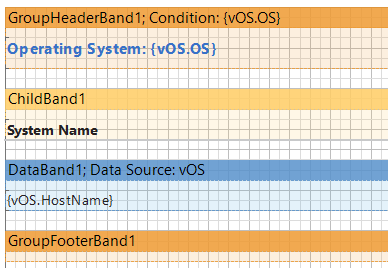
By selecting the condition, you can determine which criterion will be used for grouping. The group header band is of course still empty. The group header band will be used for the title of this report. For this reason, the format setting for the title will be used.

This ensures that the grouping criterion will be shown at the top.
Child Band
The child band is an extension of the band preceding it. In this report, a child band is used as an extension of the group header band. Following the title, a header band is often added to provide the heading for the data band. Please note that a header band for the headings cannot be inserted after a group header band, because the bands would not be shown in the correct sequence: The headers would not be placed after the title and before the data. For this reason, a child band is used for the headings of the data band. The child band is always shown after its parent band. In this report, the band with the headings will be shown after each group header band.
Create a text box, enter the “Computer” heading into it and assign the Header style.
Data Band
In order to output the data for the group header band, a data band must exist for which the same data source has been specified as in the condition for the group header band. In order to be grouped by the group header band, this data band does not need a defined relation or a master component. As the data source, select the same data source that was used for the group header band. Select the vOS table and the HostName column for this report.
In the next step, create the text box that will show the database content. When you add this field, the Text Editor opens. In the Text Editor, you can select the data fields either on the Expression or the Data Column page. To add a field from the Expression page, double-click it. On the Data Column page, click the desired field. For this report, select the HostName column from the vOS table. The style to be used is Data.
Group Footer Band
Finally, a group footer band will be added. The group footer band is the closing item of the group.
Finished Report
The header band contains the text box that indicates the operating system. The name and the condition appear in the left corner of the group header band. The System Name heading will be shown on the child band. The data band includes the text box with the HostName column. The data band name and the data source appear in the upper left corner of the data band.
