User Interface
6 minute read
Basic Structure
Use the Report Designer to create or edit reports.
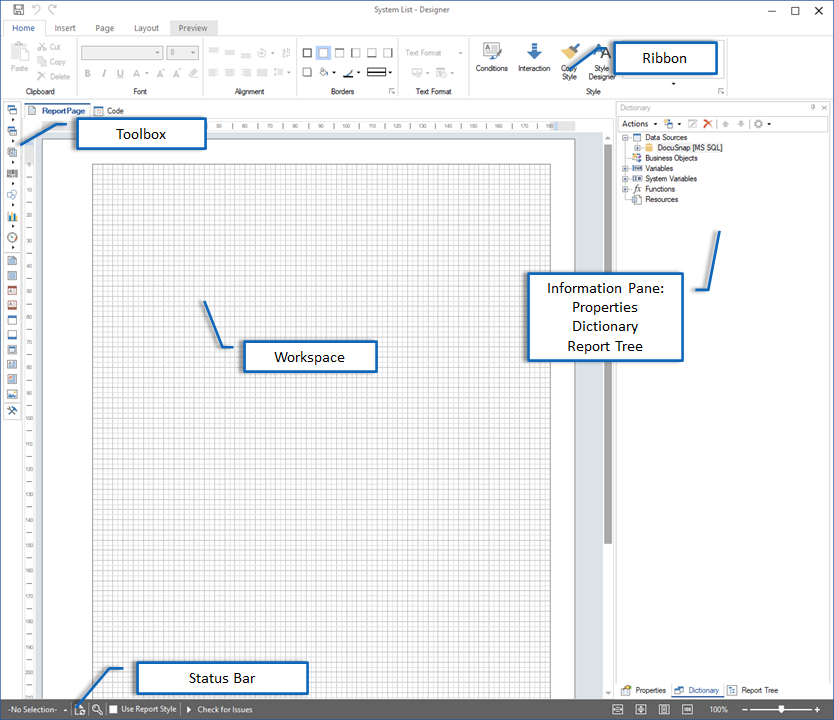
The Designer consists of five main areas: ribbon, toolbox, workspace, information pane (properties, dictionary, report tree) and status bar.

Ribbon
From the ribbon, you can define settings related to the layout and font design for the report.
Home: On the Home tab, you can choose formatting options for the selected report component. These format settings can also be selected from the information pane. In addition, the Cut, Copy, Paste and Delete buttons are available from the Clipboard group. Conditions and styles can be defined from the Style group. By setting conditions, you can define a different format setting for values that reflect a certain condition. The Style Designer shows the styles available in the current design.
Insert: Various components can be selected and inserted in the Insert ribbon.
Page: On the Page ribbon, you can define the page size and other parameters. The appearance of a report may also be changed after has been executed in Docusnap. In addition, you can add a watermark, either as a text or as an image, from this ribbon. You can also select whether the components should align with the grid and which grid you want to display. Each data band has a header part used for identification. This header can be hidden. By clicking Show Order, you can display indicators that show the z-order of the components. The tabs of the information pane can be shown or hidden. This is also true for the toolbox.
Layout: On the Layout tab, you can specify how the components of your report will be aligned and how they will be stacked. This z-order can also be set by right-clicking the component and selecting one of the Order options. Using the Size button, you can resize multiple components to the same size. They will always take the size of the first component selected.
Preview: Clicking the Preview button executes the report and displays a preview of the generated report. Since most predefined reports depend on the object they are linked with, you must specify the primary key before executing the report. If a primary key has not been provided yet, you can select it when changing to the Preview.
Toolbox
The main purpose of this toolbox is to make the components and various types of bands available when you create reports. To add a new component, you can simply click its icon in the toolbox and then click its intended position in the workspace.
Workspace
In the workspace, the tab displays the page for creating and editing reports. On this tab, you will create the data bands and define the connection to the database.
Information Pane
The information pane consists of three tabs.
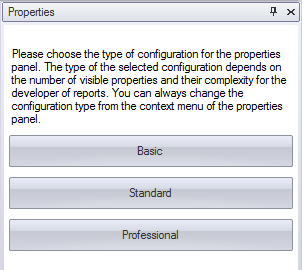
- Properties: When you open the Report Designer for the first time, you need to specify one of the settings for the Properties tab. The available options are Basic, Standard and Professional. To be able to make detailed changes to the text boxes, charts, etc., select the Professional setting because it allows highest degree of modification. You can change this setting at any time using the context menu of the Properties tab.

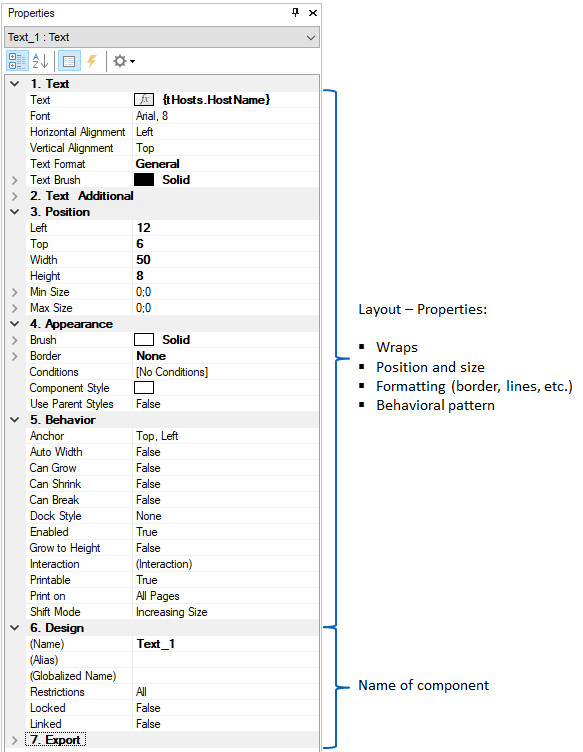
- The Properties tab displays the properties of the component selected in the workspace. Just like in the Designer for data entry screens, this tab enables you to specify the formatting, size, position and behavior of the selected component. A brief description of the selected property is displayed at the bottom of the information pane.

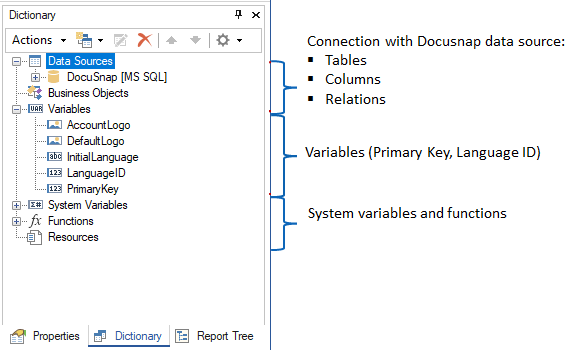
- Dictionary: On the Dictionary tab, the data source, variables, system variables and functions are displayed. The current Docusnap database will be used as the data source. All specified table definitions will be loaded. However, they are not yet connected to the database. Since only the tables needed for the current report will be connected to the database, the report will execute faster. To display the table that has been loaded into a data band, the Connect on Start property of that table must be set to True. With the options under Actions in Dictionary tab toolbar, you can save, open, add or create a dictionary. You can use the options under the
 button to establish a new database connection, create a data source or define a relation. In addition, new variables or categories can be added. Click the
  button to open the selected object for editing. By clicking the
  button, you can delete the selected object. Clicking the Up or Down arrows will change the position of the selected item in the list. To sort the items alphabetically, click the
  button.

- Report Tree: This tab displays the components in a hierarchical structure. You can verify the organization of the individual components from the tree view.
Status Bar
Company: The first button displays all companies created in the current database. You can define custom format settings for each company. When you select a company, Docusnap will apply the format settings for that company to the report. If -No Selection-displays, the format settings from the Designs and Styles dialog will be used.
Update Styles: For each component, you can select the desired format settings on the Properties tab. If a different style template has been selected, the new format settings can be applied by clicking the
 button.
Primary Key: Click the
 button to open a dialog where you can specify the primary key. After a primary key has been specified, data will be displayed on the Preview tab even if a filter has been applied to the primary key.
Use Report Style: If you specify that the report style will be used for a report, this report will always use the style currently defined for it. If you change the style in the Designs and Styles or Define Company Settings dialog, the report will still use the original style.
Check for Issues: Checks the report for errors and displays them.
Page width: Using the options to the right of the status bar, you can set the report page width and other parameters.
