Editing Headers, Footers and Cover Pages
6 minute read
Docusnap provides default reports with predefined headers, footers and cover pages. In the Layout (CI) dialog, you can edit the settings of these reports. To ensure that the header, footer and cover page will be used, either tick the appropriate checkbox(es) in dialog or configure individual company settings.
Open the master report in the Designer where you can edit the header, footer and/or cover page by clicking the Design button. A different report can be selected by clicking the  button. The selected report will be saved in the report repository as EN_MasterReport.mrt. (For German templates, the “DE_” prefix will be used instead of “EN_”.) Docusnap archives the file that previously had this file name and assigns it a timestamp so that you can restore it at any time through the operating system’s file system.
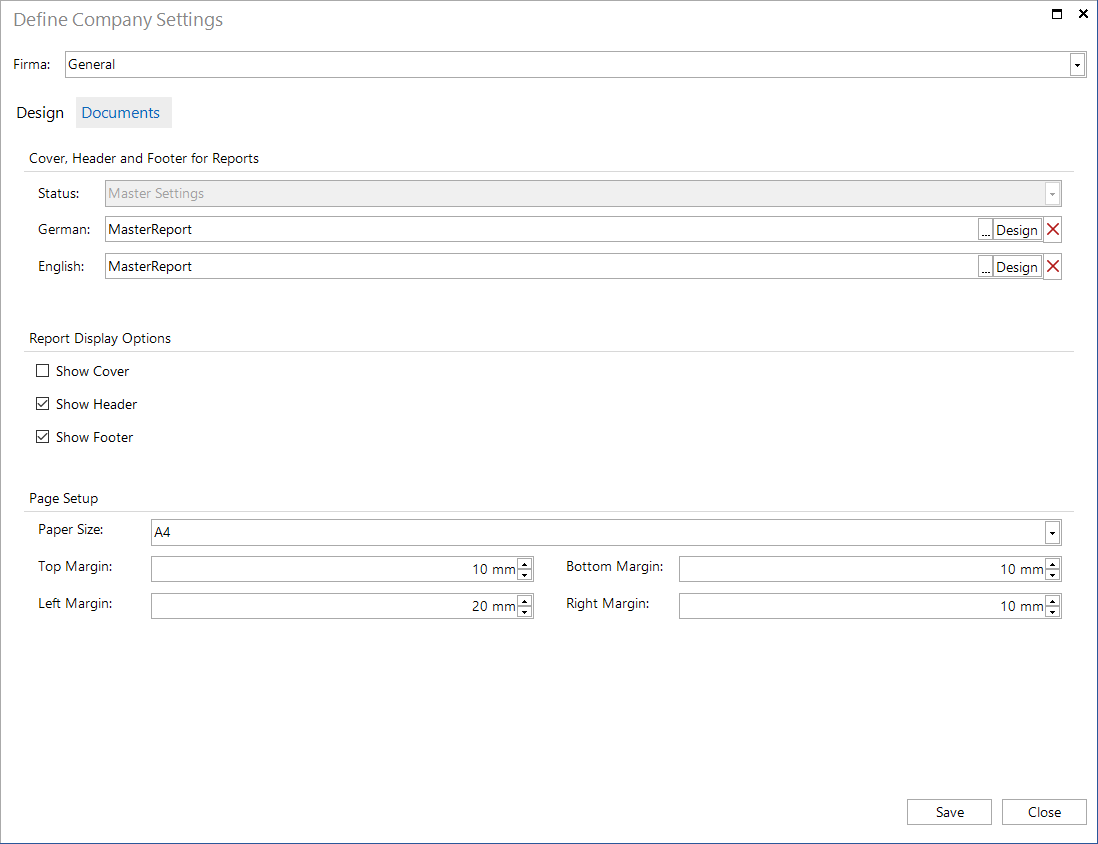
Select a company in the list box to customize the header, footer and cover page for this company. You can choose not to use the header, footer or cover page, to apply the master settings as defined in General or select an individual company-specific setting. Company-specific individual settings are always saved in the database. If you use the Individual Settings option, you can select an existing report and click the Design button to open it in the Report Designer and edit it. If no report has been selected and you click the Design button, an empty new report will be created which you can edit and save afterwards.
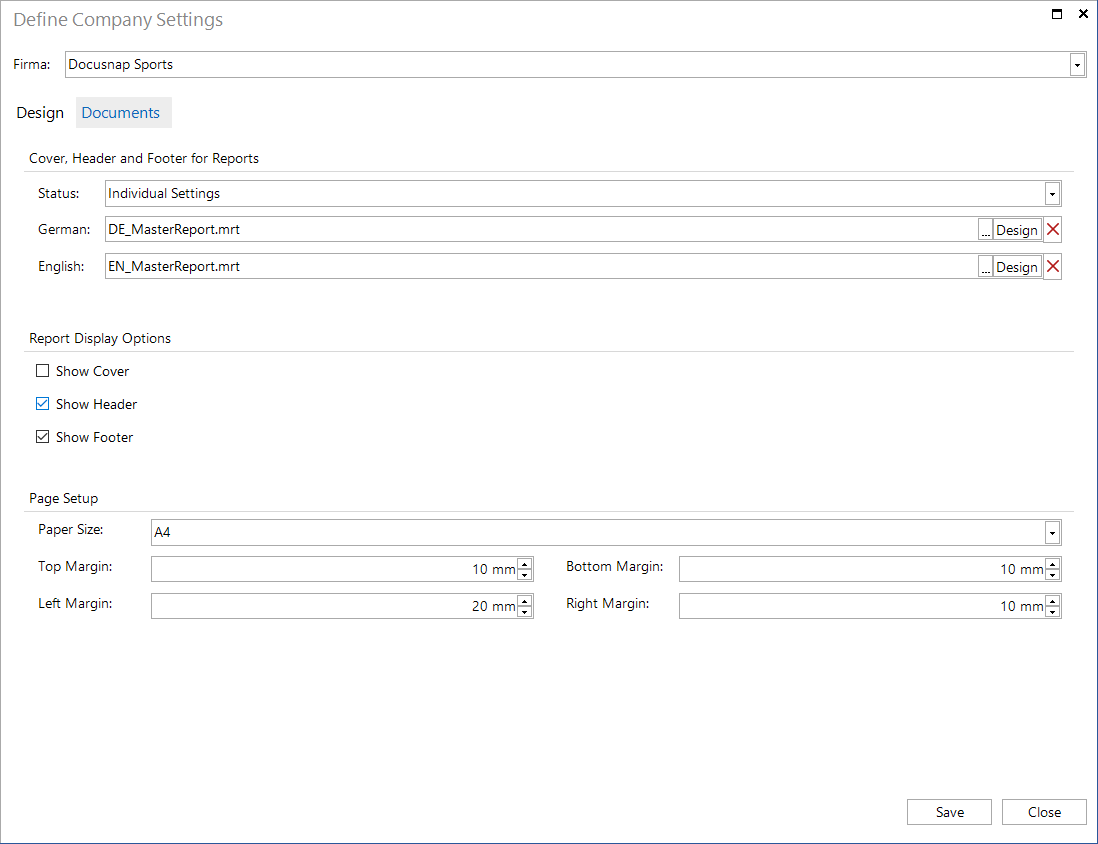
The EN_MasterReport.mrt file contains the header, footer and cover page definitions. The name of the page determines whether the page is a cover, a header or a footer. When Docusnap creates the report, the width of the main report is compared with the width of the cover page, header and footer. If a cover page, header and/or footer of a suitable width exist for the report, these will be used. By default, the EN_MasterReport.mrt and DE_MasterReport.mrt files include a cover page, a header and a footer for reports in portrait and landscape formats, respectively.
The cover page will be output as the first page before the actual report.
The header is output at the top of each page in the actual report. The header includes the report name and two logos.
The general logo and the company logo are selected in the Layout (CI) dialog. To change one of the logos, you do not have to open the header in the Designer. To change the general logo select General in the combo box of the Layout (CI) dialog and choose a different logo. To change the company logo select the desired company in the combo box and choose the new logo.
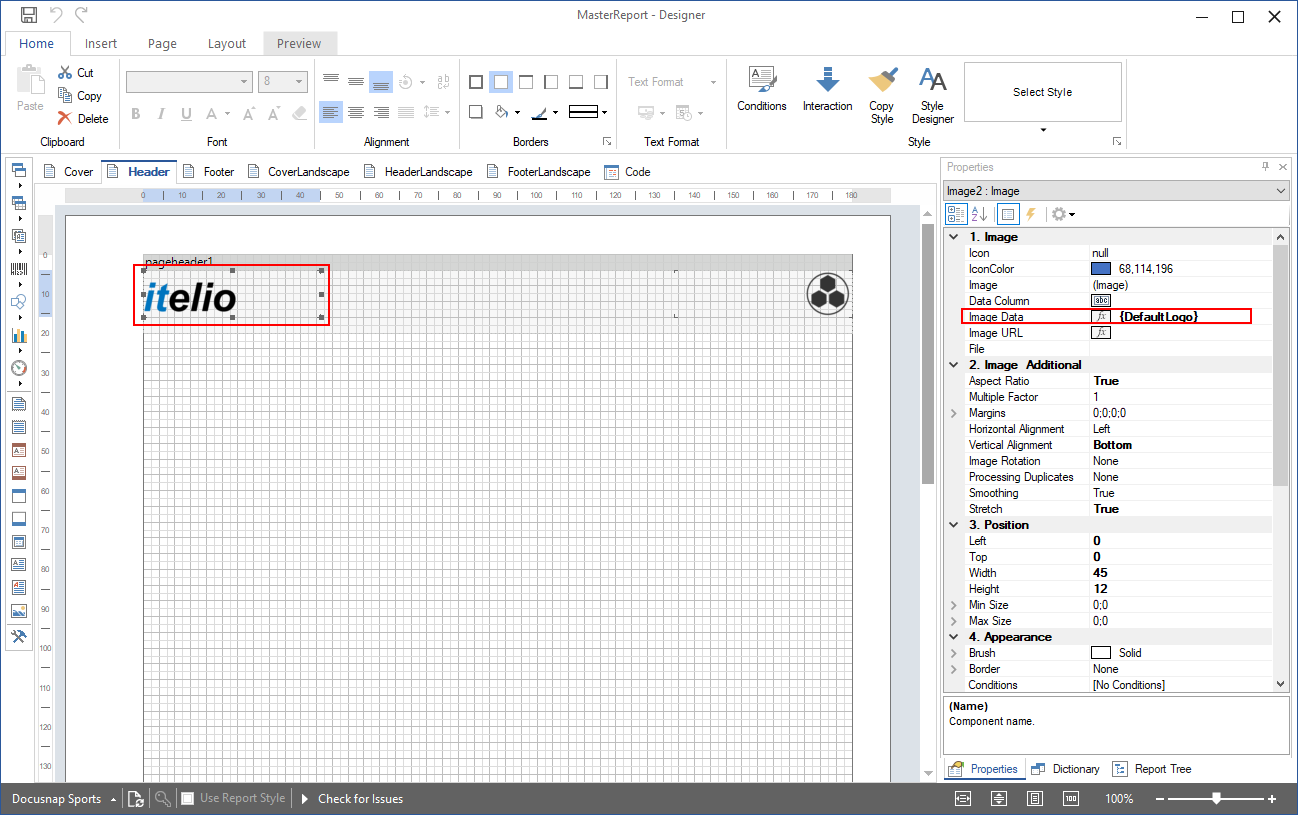
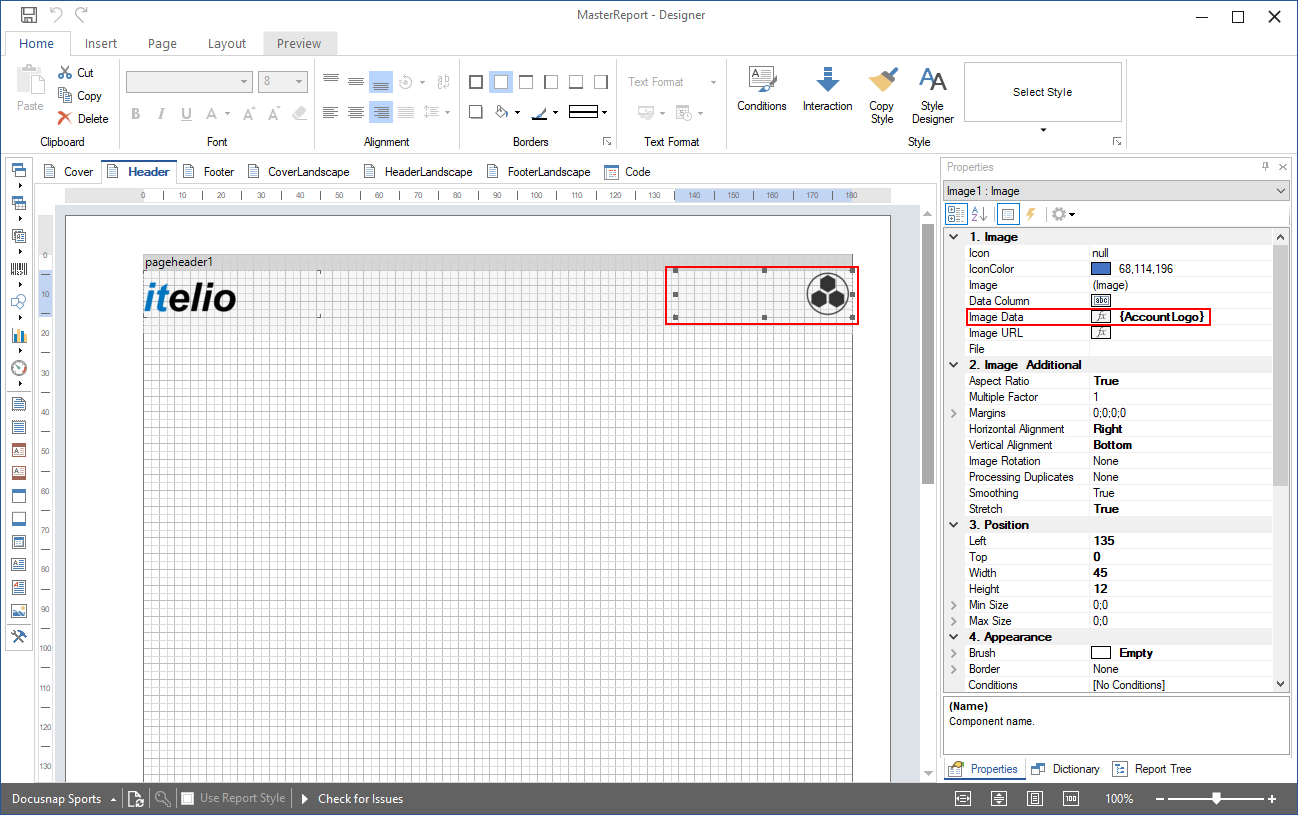
To show the corresponding logo, an image component is added in the Designer. On the Properties tab, you can set the Image-Data property to either {DefaultLogo} or {AccountLogo}. This causes the display of the correct logo.
- DefaultLogo: If you set the Image-Data property of an image to {DefaultLogo}, the general logo will display.
- AccountLogo: If you set the Image-Data property of an image to {AccountLogo}, the logo selected for the current company will be displayed.
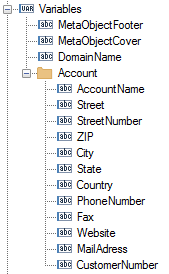
Variables for the Current Meta Object
MetaObjectCover: This variable shows the name of the object this report is linked with. It is associated with the cover page.
MetaObjectCover: This variable shows the name of the object this report is linked with. It is associated with the footer.
DomainName: This variable shows the name of the domain under which the report will be generated. If the report is generated above the domain level, this variable is blank.
Account: To show information on the company for which the report will be generated, several variables are available. For example, you can use the AccountName variable to include the company name in the report.
CoverAccountID, HeaderAccountID and FooterAccountID: These variables include the primary key of the company for which the report will be executed. This way, you can filter the database on the company name. The respective variables are used for the cover page (CoverAccountID), the header (HeaderAccountID) and the footer (FooterAccountID). When the report is generated, these variables will be replaced with the actual data. Since separate company-related variables are available in Docusnap, the variables mentioned above are no longer required in the default MasterReport.
System Variables
ReportName: Docusnap uses the report name specified in the Manage Reports dialog.
ReportDescription: This is the description stored via the Manage Reports dialog. If no description was entered, no description will be displayed.
Today: The Today variable shows the current date.
ReportAuthor: This is the author as specified in the Reports tab. For the predefined Docusnap reports, the author is “Docusnap”. To display the name of a different author, you first need to change the value in the Author field of the Reports tab.
TotalPageCountThrough: This variable shows the page count for this report.
PageNofM: This variable shows the current page number and the total page count.
Additional Page Formats
By default, each report includes a cover page, a header and a footer for the A4 portrait and landscape formats with page margins left of 2 cm and right, top and bottom margins of 1 cm, respectively. If required, you can define a cover page, header and footer for a different page format. To do so, right-click the area next to the pages tabs to open the context menu and select New Page.

On this page, you have to define with the beginning of the name whether this page is a cover, a header or a footer. Then, assign the desired page format to the new page. You can now create the content to be used later for the cover page, header or footer. If you later create a report with the same page width as the new pages, the newly created cover page, header and footer will be used.
Make sure that the page names are unique, otherwise the report cannot be displayed. If the MasterReport includes multiple pages with the same page width, the leftmost page will be used first.