Data
6 minute read
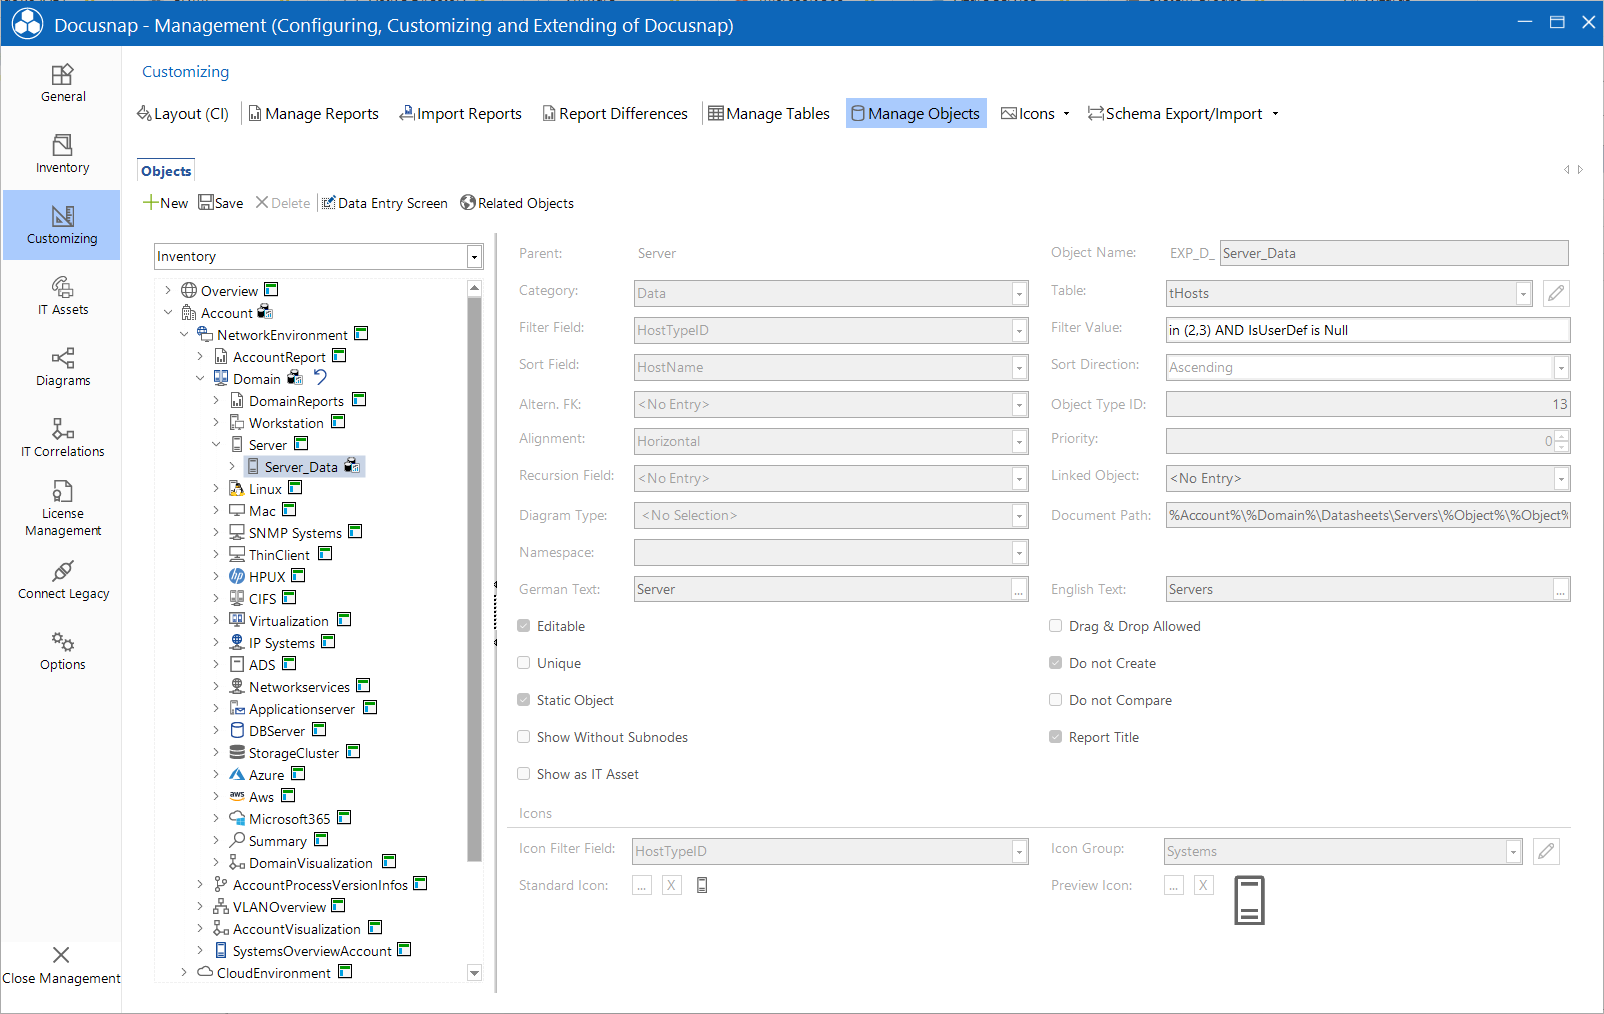
A meta object of the Data type is used for the output of database tables in the hierarchy. For this reason, such a meta object must be linked with a database table, view or virtual table. For this object type, additional settings and options, especially for the display of content data, are available.

Virtual tables are used for the output of data from various tables in a single table where they can be sorted by a specific value. A virtual table node will not be shown in the tree view, but rather is used to combine the data from the dependent tables. The column names in the virtual table must match the field names in the tables being combined. For this reason, the tables to be used here should share some columns. The primary key of the parent node is used as the foreign key for the subnode. In order to show different icons in the table for display in the main window, define such icons using the Icon Filter Field.
Available Options for Data-Type Meta Objects
| Property | Description |
|---|---|
| Table | Here, you can select the linked data table from the list of meta tables. Meta tables can be modified or extended from the Metatables tab. By clicking the  button next to the selected table, a dialog for editing the tables will be opened. button next to the selected table, a dialog for editing the tables will be opened. |
| Filter Field | This is the table field used for defining a filter. |
| Filterwert | Filter criterion for the Filter Field. In this field, you can enter any valid SQL conditions (such as = 1). The clause can further be extended using additional fields or conditions. Examples: = 1 AND Hostname Like 'S%'<> 5 AND HostType in (1,2,3) |
| Sort Field | Database field on which the displayed elements will be sorted. |
| Sort Order | Order in which the data of the sort field will be sorted. |
| Alt. FK | An alternate foreign key is used if you want to build the hierarchy using a foreign key that is different from the one specified in the Metatables dialog. This option can only be used with real tables. If a data entry screen is used for this node, the alternate foreign key column of new entries will automatically be filled with the primary key of the parent node. The actual foreign key for the table must be entered using the data entry screen. |
| Editable | If this checkbox is enabled for a meta object, a data entry screen can be created or is available. If entries are created in the tree for an object, they can only be deleted if the Static Object option has been activated. The primary key of the assigned table must be of type Int or BigInt in order to create and edit entries. |
| Unique | This flag ensures that only one object can be created for each level. This option can only be selected for meta objects where the Editable checkbox is enabled. |
| Do Not Create | If you tick this checkbox, the object can only be deleted or saved. The New button is disabled in this case. This means that users can only edit objects, but cannot create new ones |
| Recursion Field | By means of this property, you can define a recursive field, and thus build a hierarchy on the basis of a table. At the first level, only records will be shown where the recursive field contains the value NULL or -1. Make sure to always define a recursive field as a Int data type. At the second level, Docusnap shows records where the recursive field contains the value of the primary key from the first level. If a small blue arrow appears in the tree hierarchy at a recursive object, there is a repetition in the recursion. |
| Drag & Drop Allowed | The Drag & Drop Allowed check box defines whether it is possible to move an element from one level to another within a recursive structure using drag & drop. For this reason, this check box can only be activated if a recursion field has been set. |
| Show as IT Asset | It is possible to display IT assets anywhere in the tree, for example, below a contact, which they were assigned to. In the first step, a property is created for the required IT assets. These must be named the same for all IT assets. For example, create a property xContacts of type List and the use the table tContacts as the reference. Then a view with an SQL statement needs to be created that lists all necessary ObjectIDs (see Modification of the Structure). Insert a new meta object at the point where the IT assets should be displayed and select the created view as the table. Then the check box Show as IT Asset is activated, thereby the respective IT assets for all ObjectIDs appear with all properties. This meta-object does not require an icon, as the icons of the IT assets are used. |
Icon Filter
Using an icon filter, you can assign one of various icons to a meta object based on the value of a certain column. Thus, it is e.g. possible to define only a single meta object to be used for workstations, servers and domain controllers, but assign different icons by means of the icon filter.
For the icon filter, icon groups are created and the icons with the respective values are defined.
To enable the icon filter, select the data field that contains the filter value from the Icon Filter Field field. Then select the group containing the desired values and icons in the Icon Group combo box. If the table includes a value for which no custom icon has been defined, the default icon for that object will be used
![]()
If the needed group does not exist yet or the required values and icons are still missing in the group, the  button can be used to open the dialog for extending the icons. If a group has already been selected, the view is filtered by this group. If no group has been selected yet, all groups will be displayed.
By clicking the New button, a new value and icon can be added for the selected group.
![]()
If a new group is needed, the  button can be used to open the dialog for creating new icon groups.
![]()
Related Objects
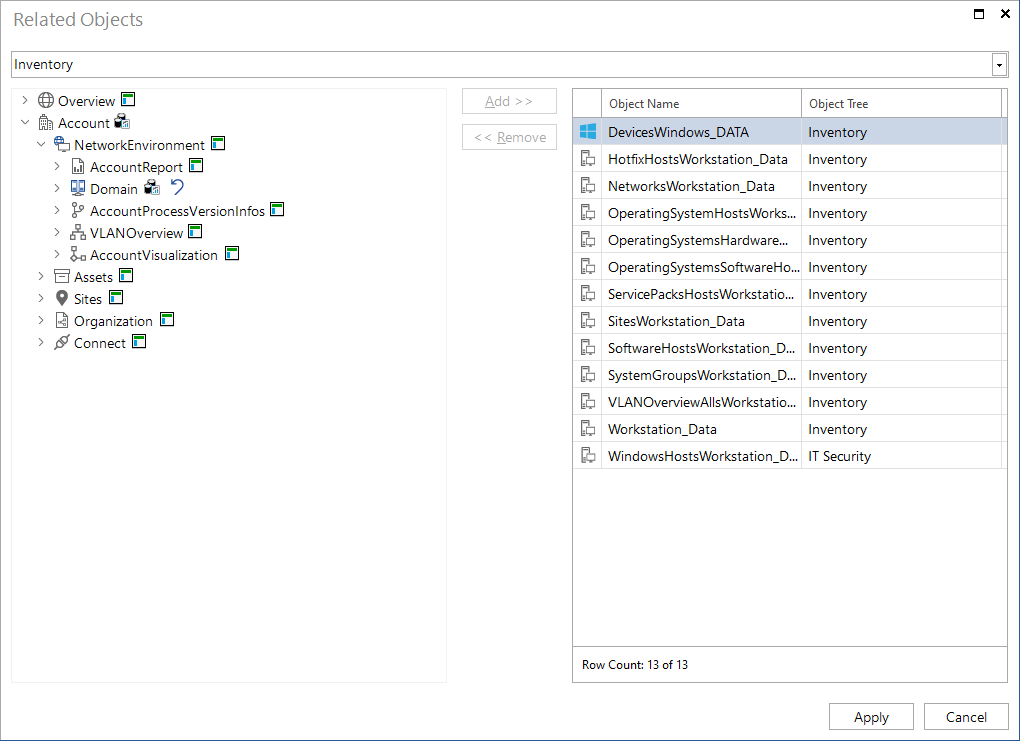
It is possible to use the same objects in multiple hierarchies. For example, the same system can be displayed in the Inventory tree view under the Workstations node and in the IT Security explorer. You can specify permissions and extensions for each system. To make sure that this information will also be displayed for the same system when listed in the IT Secuirty hierarchy and do not have to be re-created, these two objects were defined as related objects.
To do so, switch to Related Objects tab and select the related objects. In the left pane, all tree views will be displayed, and the right pane shows the objects that have already been defined as related types. When you select an object in the left pane, the Add button is enabled.
If you define related objects for the current object, it is recommended to repeat this assignment in the other direction, i.e. to assign this object to the related objects as well.

Index search
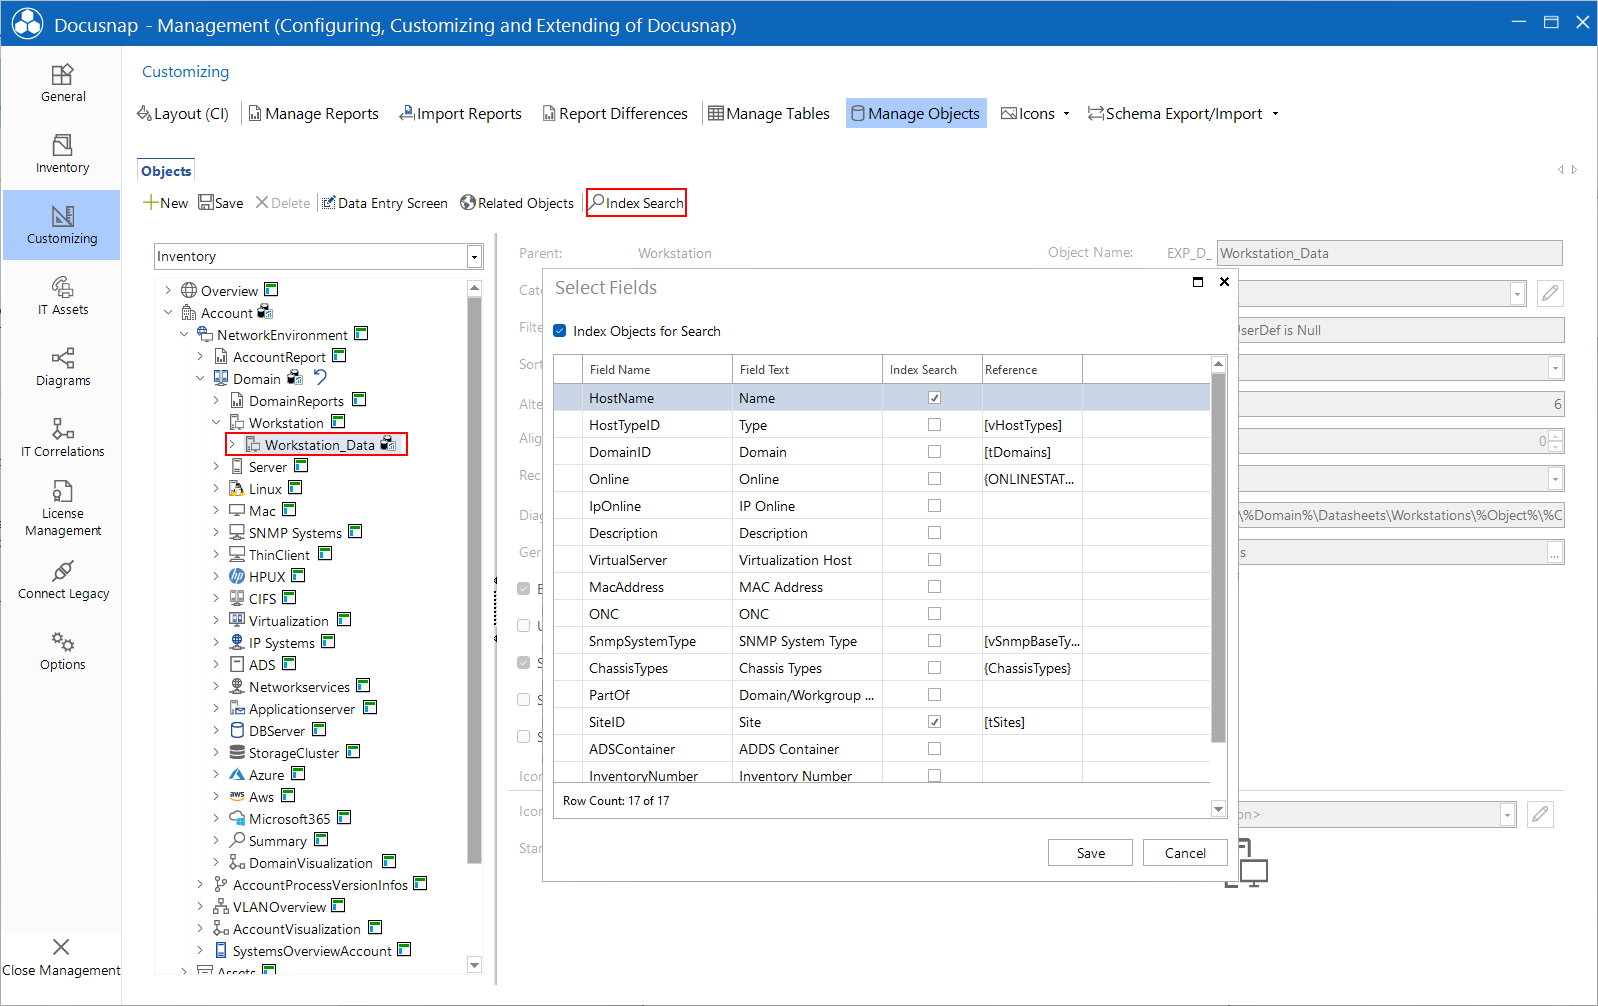
If the Enterprise Search is enabled and an object of the Data type is selected, then the Index Search button is displayed and can be used to add more fields of this object to the search index.
