Additional Tools Telnet/SSH
7 minute read
Docusnap offers with additional tools to optionally execute commands on a target system and save the results in Docusnap.
Click the Additional Tools Telnet/SSH button in the SNMP drop-down list to open the tab for managing Additional Tools. Use the New button to create an Additional Tool. The name of the tool can be assigned freely. A description does not have to be entered.
The Type field determines whether the command sequence is executed via Telnet or via SSH. This selection controls which commands are offered in the sequence editor. If the type of an Additional Tool that already contains a command sequence is changed, the existing sequence is discarded after a confirmation prompt, because the commands are type-specific.
Two templates were created for a quick start. A configuration query is created on a switch (without manufacturer reference). The example is available for the call via Telnet and via SSH. The template can be duplicated using the Copy button and adapted as desired. The copy is automatically given a unique name so that the template itself remains unchanged.
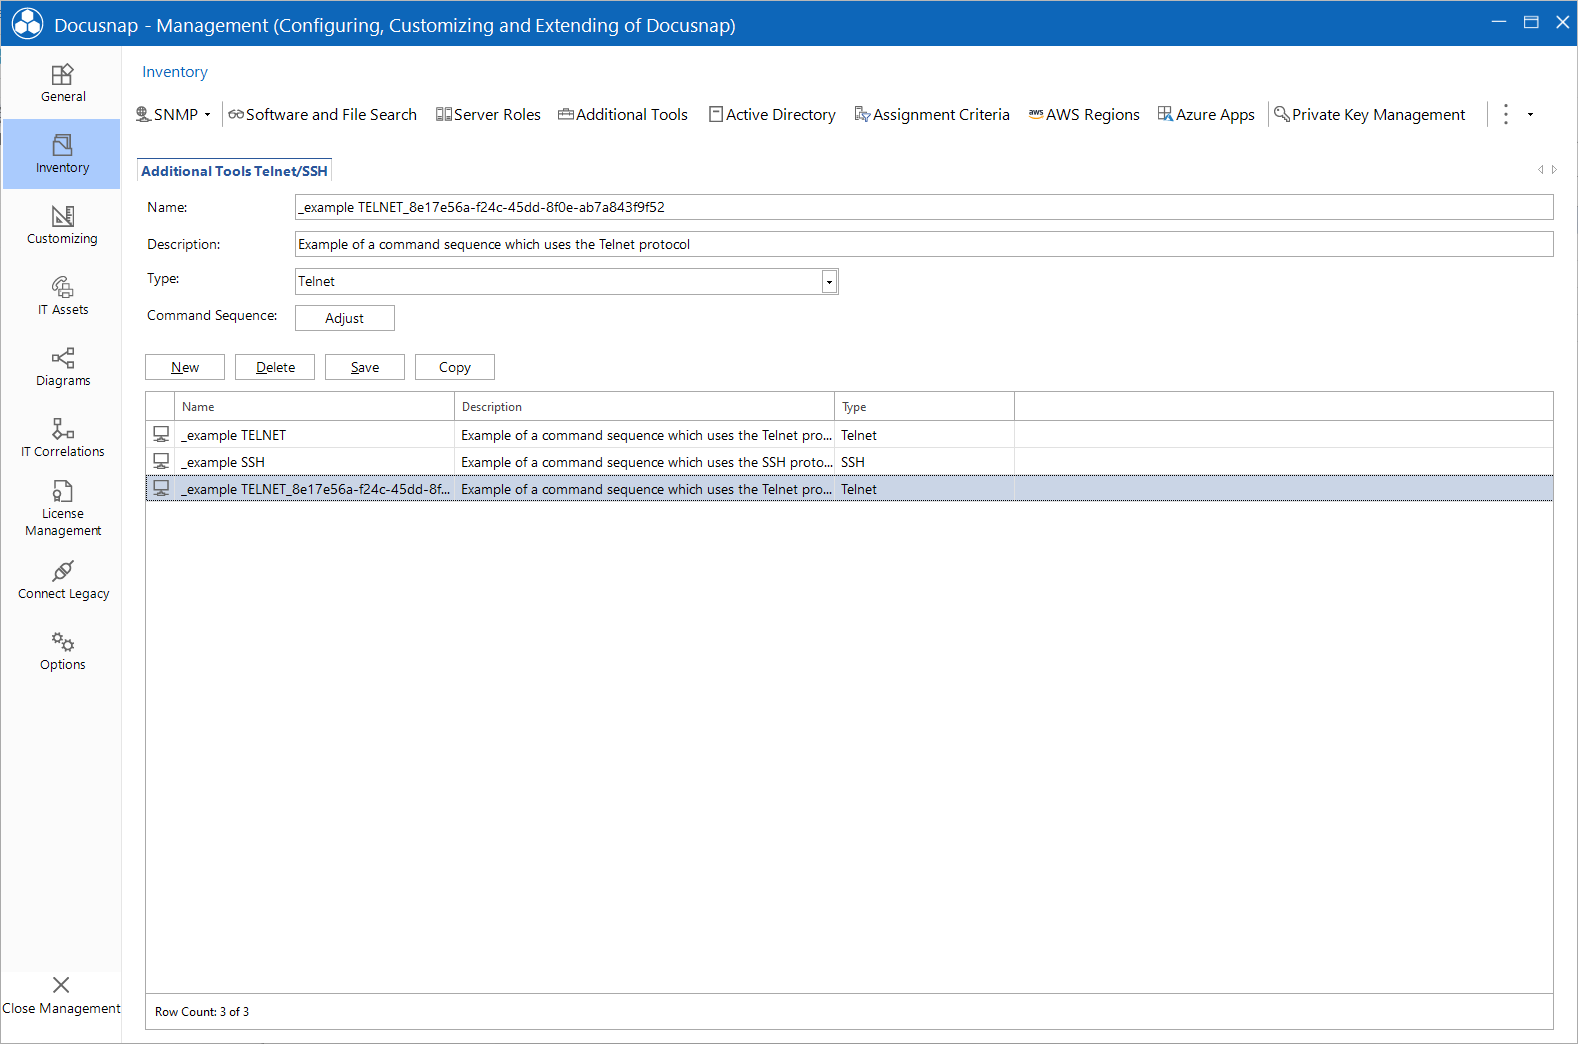
Clicking the Adjust button opens the sequence editor. The sequence of commands to be executed on the target system to obtain the required execution results is called a command sequence. Here, as in a batch processing, the required commands are created and processed.
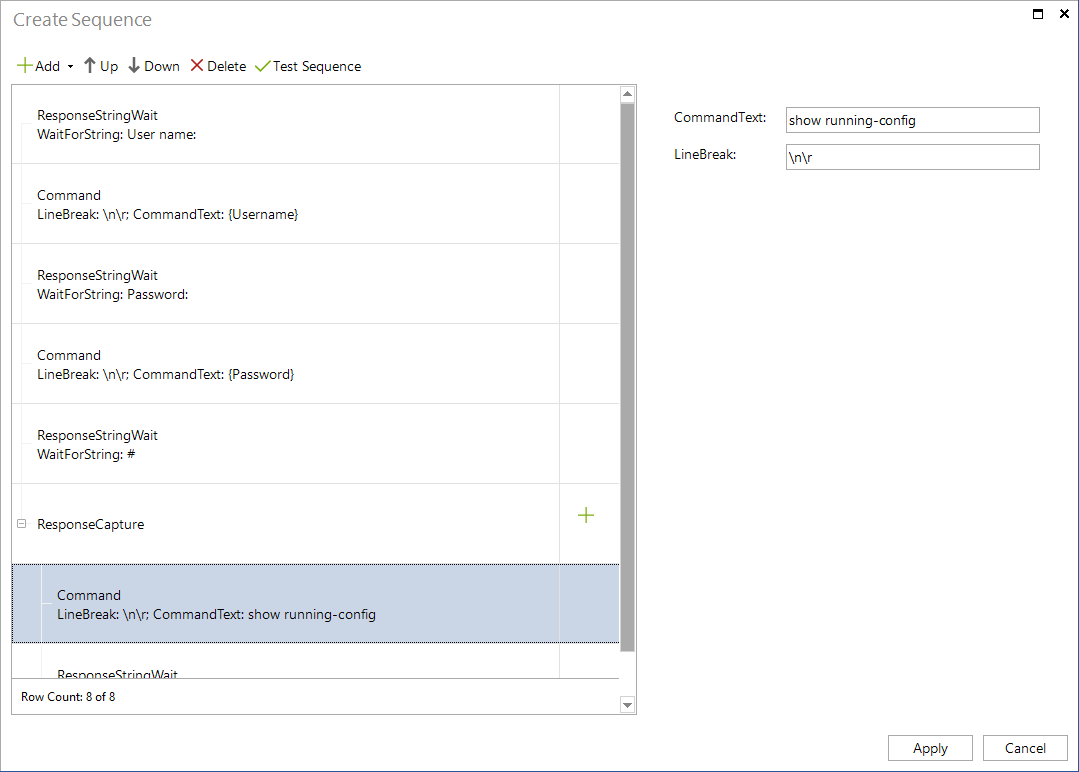
Create Command Sequences
Generally, the same commands are used for Telnet and SSH. The main difference between the two protocols is the authentication. In the Telnet version, the handling of user name and password must be entered in the command sequence, but this is not required for SSH.
Currently supported commands
- DelayWait: Creates a pause to give the target system some time to establish a connection or to execute asynchronous commands if necessary. The wait time in milliseconds can be passed as a parameter.
- ResponseStringWait: Waits until a string defined as parameter is displayed in the console. In the examples, # (followed by a space) waits for the console prompt. Using this check between commands increases the stability of the query.
- ResponseRegexWait: Same function as ResponseStringWait but a regex expression is passed instead of the string. An example of the console prompt in regex notation would be .*#\s$
- Command: This command is used to query technical details of the target system (e.g. show running-config). It is also required to control the console behavior. For example, Command is used without parameters when the console is waiting for “any key” input. It is also a good idea to use the command “no page” to disable the page switching of the console. In general it is recommended to run through the command sequence in the console beforehand to detect possible problems in advance. For Telnet, the additional parameter LineBreak is available to control the line ending appended to the command. This parameter is not available for SSH, because the line ending is added automatically there.
- ResponseCapture: This command “starts the console output capture for Docusnap”. All previously executed commands are not present in the Docusnap output. It is important to create commands following the capture as a subsequence using the plus sign next to the command. The capture only returns data from commands that are within this command grouping. In the editor, these commands are additionally indented below the capture. It is recommended to check the console prompt as the final command of a capture sequence.
Currently supported optional commands within a capture sequence
The captured output can optionally be edited before it is transferred to Docusnap, e.g. to remove unwanted formatting or security relevant information from the output. For this purpose, the following commands must be created within the capture command grouping.
- ResultCleanString: The command has two parameters “Find” defines the string to be processed, “Replace” the string to be applied. For example, the string “Community Geheim#2021” becomes the string “Community *********”.
- ResultCleanRegex: Works like ResultCleanString and uses regular expressions instead of strings in the parameters. This can be very convenient if, for example, you want to always replace the characters after “password with *****. The regex expression here would be password\s.*.
Use SSH Command Channel (Beta)
For Additional Tools of the type SSH, the command sequence can be executed through an SSH command channel. The option is not available for Additional Tools of the type Telnet.
The difference becomes apparent in the structure of the sequence: waiting for the output of the target system no longer has to be reproduced manually. A sequence therefore consists only of the commands that actually query something - Command and ResponseCapture - plus, optionally, ResultCleanString and ResultCleanRegex for post-processing. The commands DelayWait, ResponseStringWait and ResponseRegexWait are no longer offered in the sequence editor.
The page switching of the console no longer has to be turned off by a dedicated command either: it is disabled automatically when the connection is established. If the target system does not accept any of the commands known for this purpose, the output is retrieved page by page instead.
This keeps sequences considerably shorter. An existing sequence can be reused: if it is opened in the sequence editor while the option is active, the commands DelayWait, ResponseStringWait and ResponseRegexWait are removed from it. This only takes effect once the editor is closed with Apply and the Additional Tool is saved afterwards; with Cancel the stored sequence remains unchanged.
Configure and Run the Sequence Test
The built-in Test Sequence function can be used within the editor to test the created command sequence on the target system. If a command fails, the user receives feedback as to which command in this sequence caused a problem. However, a syntax check does not take place.
Before the first test, the Configure sequence test button must be used to define against which system and with which credentials the test is run. The Test Sequence button is only displayed once a configuration exists; the configuration button is then labeled Edit configuration. The following entries are required:
- Company and domain in which the target system is located
- Discovery Service through which the test is executed. The status of the available Discovery Services and their plugin version are shown in the list. A Discovery Service that is not connected cannot be used.
- SNMP device as target system. Available for selection are the systems of the selected domain that have already been inventoried as an SNMP device, as well as inventoried Linux systems.
- User name and password for logging on to the target system
- Timeout in seconds
Apply and check saves the configuration and starts the test immediately, Apply only saves it.
The test result is displayed in the Check Sequence dialog. It shows a protocol of the individual sequence steps. When the SSH command channel is used, the output additionally contains notes on what the run did before and while executing the sequence, as well as the captured output of the target system. The Adjust configuration button returns directly to the test configuration. A running test can be cancelled at any time - the protocol reached up to the point of cancellation is displayed in that case as well.