Edit Package V1
4 minute read
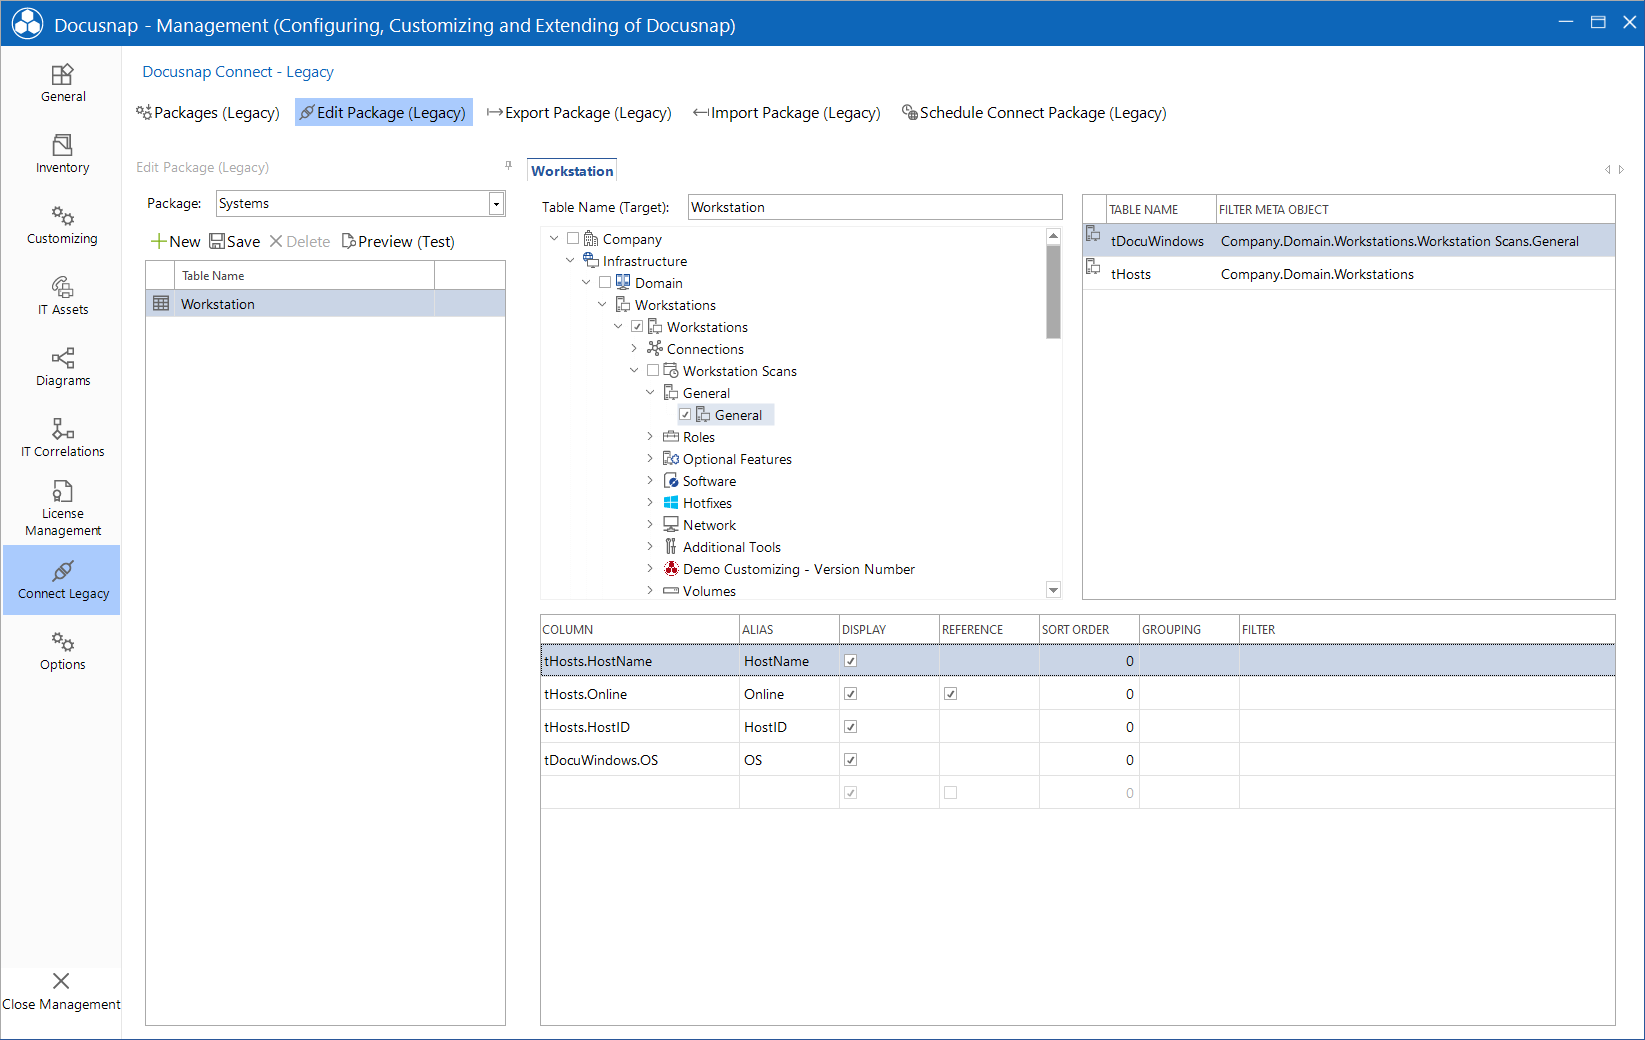
Click the Create Package (Legacy) button in the Connect (Legacy) area to open the tab for configuring the Docusnap Connect packages. Only Connect Packages that were created as Connect V1 Package are listed here.
The combo box Package all the defined packages are listed. After you select a package the content of this package can be configured.
In the Table Name list all already defined tables are displayed. When you first open a package an empty table named TableName is already created. Enter the name to be assigned to the table after the export in the Table Name (Target) field.
The tree structure displays all entries from the Inventory explorer. Tick the checkbox to the left of each table that you want to select for export. The selected tables are listed in an overview table.
To export multiple tables, click the New button to add more tables for which the data can be configured.
- Column: By double-clicking a field in the Column list, you can display the columns of the selected table. Select the desired column there. If you no longer need a column, you can remove it by either selecting Delete from the context menu or select the line and press the Del key on your keyboard. Constant values can be exported, in addition to the values from the table. In this case input the desired text in ’ ’ and numbers just as a number in the Column field. The name of the column after the export is defined in the Alias column.
- Alias: In the Alias column, you can specify the name of the column in the exported table. Each name in the Alias column must be unique.
- Display: If you enable the Display checkbox, the column will be displayed in the exported table. By disabling it, you can hide fields that are only used for data filtering.
- Reference: For columns with a reference specified, the reference can be added to the export. If you enable the Reference checkbox, the number in the column will be replaced with the corresponding reference text. When exporting, you can select the language in which you want the reference to appear.
- Sort Order: Using the Sort Order column, you can define the column order.
- Grouping: Here, you can select whether the respective column will be used for grouping or whether to calculate the count, maximum, minimum, sum, or average of the column.
- Filter: Here, you can enter any valid SQL condition (e.g. = 1). The clause can further be extended by additional fields or conditions. To hide the column used for filtering, you can disable the Display checkbox for this column.

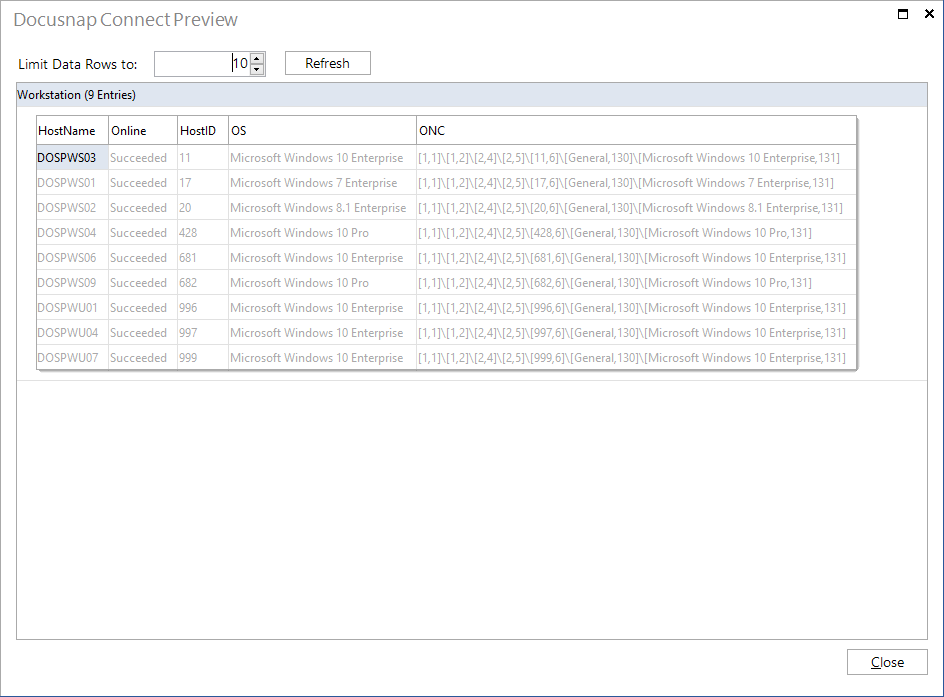
Once you have selected the tables and columns, you can click the Preview button to check the table output. By default, the first ten data rows of the table are shown in the preview. You can change this value in the Limit Data Rows to: field.

For the export, an additional column named ONC will be added to the data. This column identifies each object unambiguously so that, during an update of the SQL database, the objects can be mapped without problems. This column is also used for DocusnapLink when switching from another application to this Docusnap node.
Special Features
ADS
When exporting ADS users, the system will add another table to the table selected for export. This table, with the _Values suffix, contains the additional properties of the users, such as account options, first name and last name, etc. The ADSObjectID column can be used to establish the corresponding relation.
IT Assets
When exporting IT assets, the system will also export two tables. The first one contains the values of the IT assets class. The ParentID column is used to map an existing hierarchy. The second table, with the _Values suffix, contains the values of the properties of each IT asset. The ITAssetID column is used to establish the relation between the two tables.