Distribution of Modifications
6 minute read
Underlying Principle
In Docusnap, it is possible to export customizations made to the database structure, the meta objects and the data entry screens and to apply them to other databases and Docusnap installations without much effort by importing them in the other environment.
You can export and import customizations via the Docusnap Management.
Namespace
Namespaces in customizing mean that each extension of the metaschema (tables, views, data tree objects) can be provided with a namespace. This way, all objects belonging to a larger customizing can be linked to each other. This is especially useful if a specific customizing should be exported and other customizings exist in this database. In the course of the export, the specific namespace can now be selected and the associated tables, views and data tree objects exported.
Exporting the Database Structure and the Meta Objects
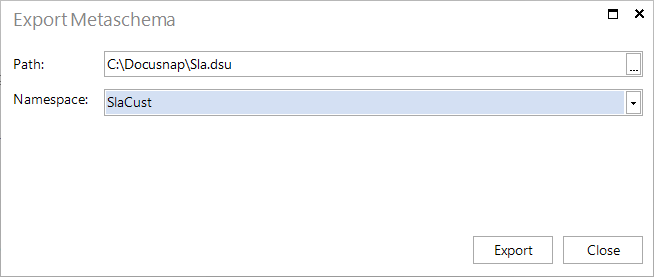
In order to export a meta schema, Docusnap must be connected to the database that contains the corresponding schema. By clicking on the Export schema button in the Customizing area, the Export metaschema dialog is opened. In the Path field, a storage location can be selected. In the field Namespace it is selected whether All or only a certain namespace should be exported. If a namespace is selected during export, all objects, tables and columns of this namespace and those with empty namespaces are taken into account. By clicking the Export button the current schema will be exported. A new file with the extension .dsu is created at the selected location, which contains the customizations made to the current Docusnap database.
Importing the Database Structure and the Meta Objects
Previously exported customizations of the meta schema can be imported into another database using a wizard. To do so, Docusnap needs to be connected to the target database at the time of the import process. By clicking the Import Schema button on the Customizing area, you can open the associated wizard that helps you specify further settings.
If a namespace was used when exporting the customizing, the import dialog now also shows which object is assigned to which namespace.
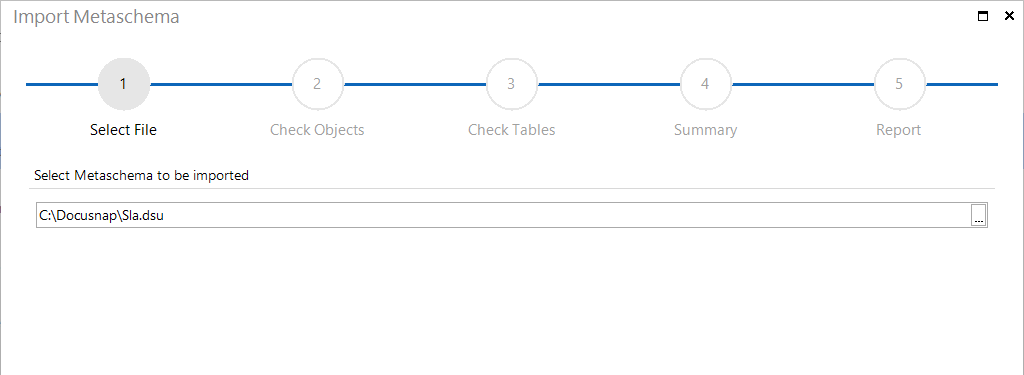
The first step in the wizard is to select the previously exported file which contains the modified meta schema. When you click the  button, a file selection dialog opens where you can open the desired .dsu file.
In the second step, the wizard will display all customized and newly added meta objects that exist in the selected file and that will be imported into the current database. When importing the file, Docusnap considers all objects from the schema file. This means that all meta objects contained in the file will be imported. Due to the potential dependencies between the objects, a selection is not possible at this time. After the import, you can use the Manage Metaobjects dialog to delete any objects that are not required.
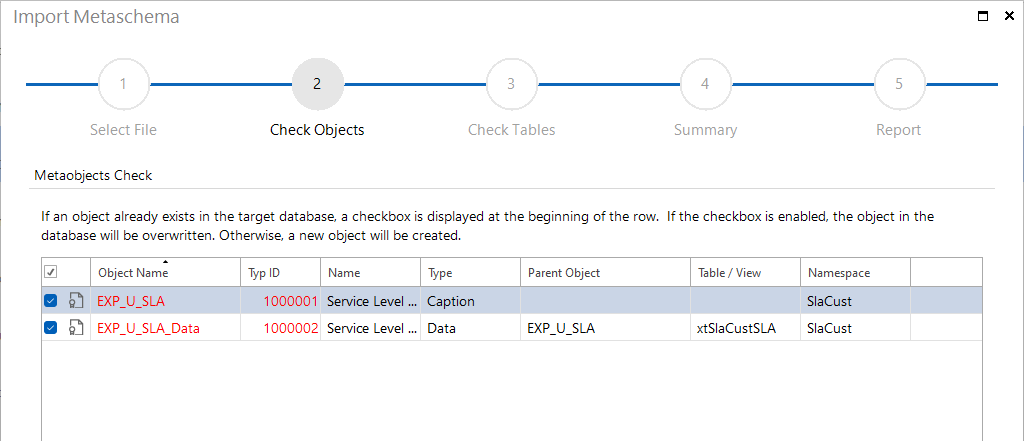
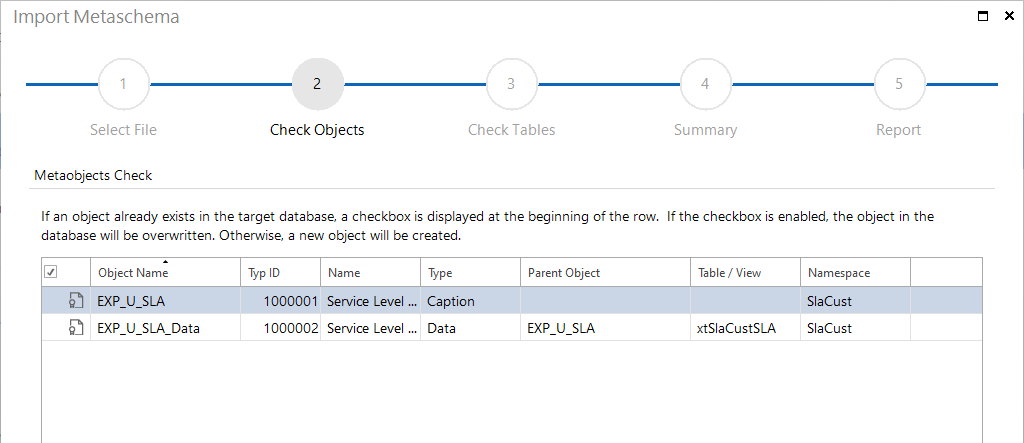
If a checkbox is displayed next to an object to be imported, an object with the same type ID already exists in the target database. The red font indicates that the corresponding object name or type ID is already present among the meta objects of the target database. If you enable the checkbox, the corresponding object in the target database will be overwritten by the information from the selected file. If you leave the checkbox unchecked, a new object with the same name, but a different type ID, will be created in the target database. In this case, the original object in the target database remains unchanged. If the type ID already exists but the object name is different, and you select the option for overwriting existing data, Docusnap will also overwrite the existing object name with the one from the import file.
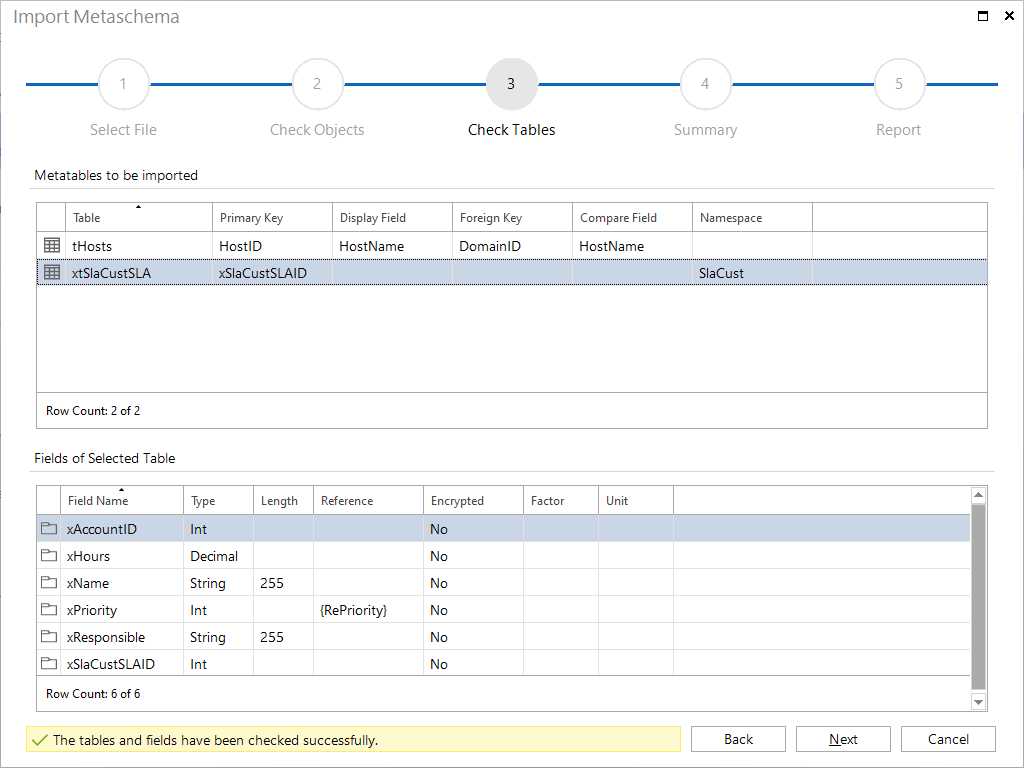
The third step of the wizard lists all tables that are present in the selected file and that will be imported into the target database. The following figure shows a table called xtSLA which does not exist in the Docusnap system schema. The tHosts table, in contrast, belongs to the system schema. A field was added to it where users can enter additional information.
The Metatables to be imported list displays all tables that are either user-defined or have been customized by adding user-defined fields or by editing existing fields. When you select a table in the upper list, all added or modified columns of the selected table will be displayed in the Fields of Selected Table list below.
If a table does not yet exist in the target database, the table will be created with all its fields. If the table already exists, this list shows only the columns that are still missing. Docusnap will never delete fields that, while existing in the database, are not associated with that table in the schema file. All tables and fields will be imported during the import process. It is not possible to exclude individual tables or fields from being imported.
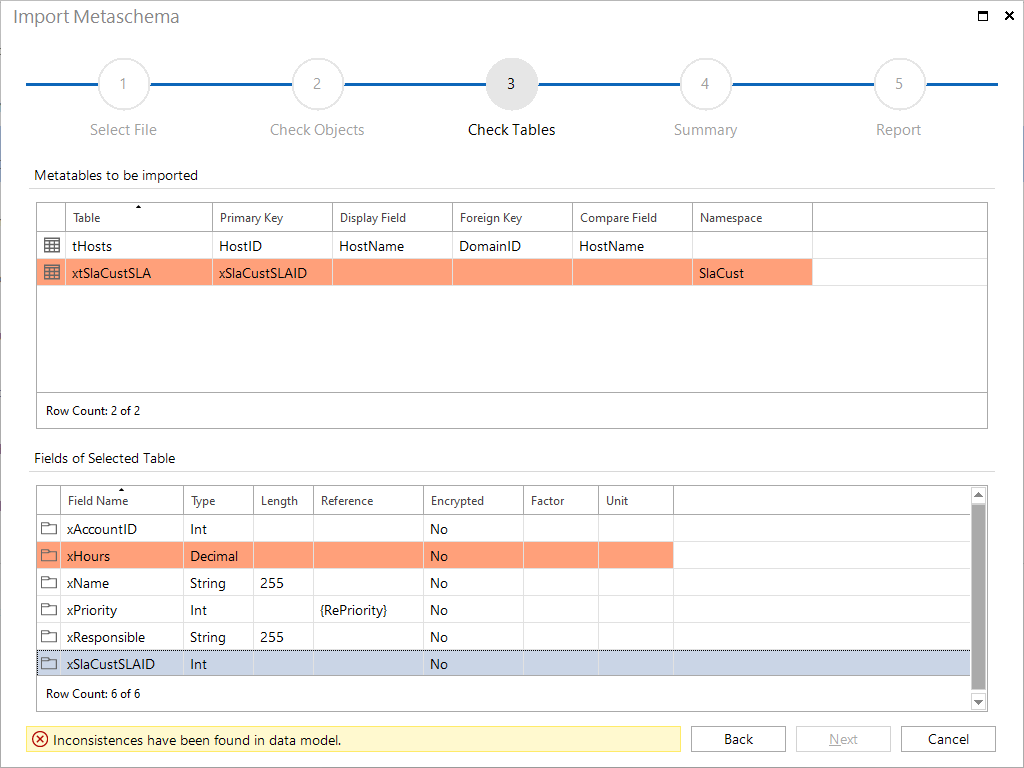
If a field already exists in the target database, but has a different data type than that of the definition in the import file, the field will be highlighted in red in the corresponding list. When you click the table in the upper list, Docusnap will display the columns in the lower list, highlighting the fields that still have problems in red. To perform the import process, change the data type in either the target database or the source database. However, the data type can only be changed by deleting the affected column and re-creating it with the other data type. Please note, that all data in this field will be deleted from the database. If you change the field in the source database, you need to re-export the schema file to make sure that the updated data will be imported. If you change the field in the target database, however, it is sufficient to only delete the field, since it will be re-created by importing the source file, this time with the appropriate data type from the source database.
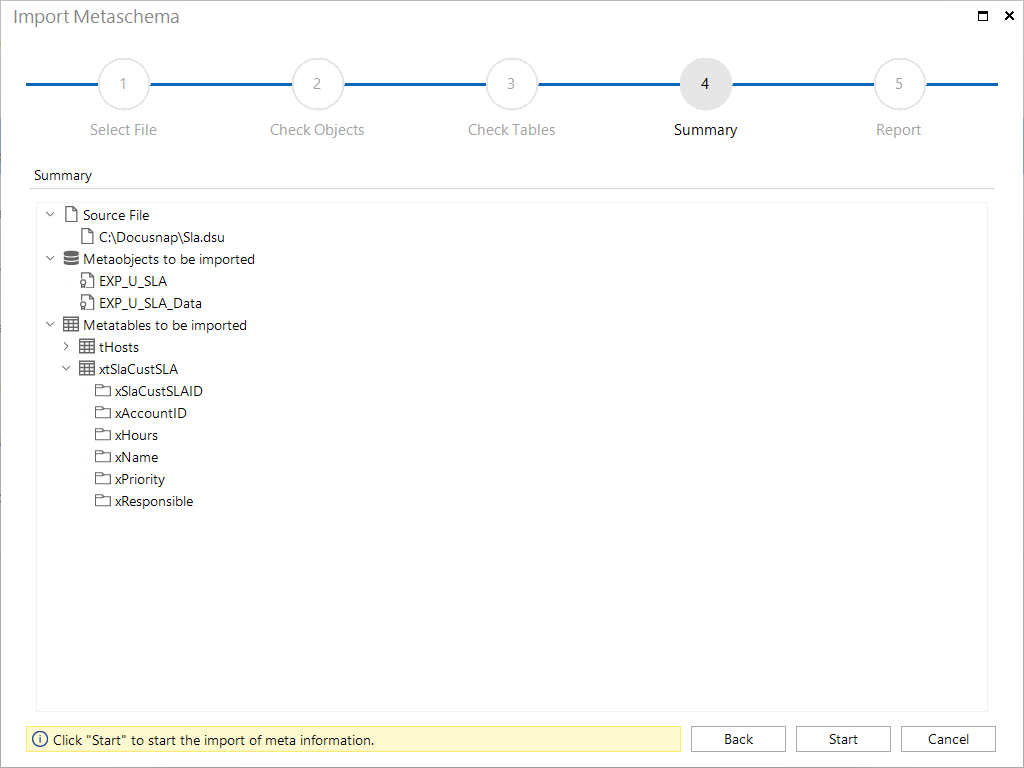
The last step of the wizard shows a summary of all objects and tables to be imported. By clicking the Back button, you can change the selection, if required. To import the objects and tables into the target database, click the Finish button.
Distributing Data Entry Screens
Customized or newly created data entry screens are not automatically distributed by means of a wizard, since they are independent from the database in use. Instead, they will be loaded from the respective local or team settings. In order to make these changes available to multiple users, these users need access to the corresponding .dsu files. If team settings are used, it is usually sufficient to copy the modified .dsu files to the DataEdit subdirectory of the team settings directory, unless this has been done automatically when saving the data. If local settings are used, the corresponding files will always have to be distributed manually.